

This article is an end-to-end guide that goes from local Rust development to implementing the standard deployment of a high performance rust-binary on AWS cloud infrastructure. It details the production-grade deployment of a real Rust(Axum) API on an Ubuntu EC2 instance.
While this guide is perfectly suitable for small engineering teams using ClickOps deployment strategies(via the AWS console), it is also a great resource for teams and DevOps engineers working on more complex workflows, as it clearly explains the fundamentals involved in deploying raw binaries on any cloud infrastructure of their choice.
What You'll Be Learning.
In this tutorial, you'll learn:
- About managing servers on AWS EC2.
- Why deploy binaries instead of running servers: when performance and scalability matters.
- About Nginx: how to deploy and use it as a reverse proxy, and as a tool for generating free SSL certificates for your domains.
- About Route 53 - AWS' DNS management service.
- About "Systemd" - a Linux OS system and service manager that every cloud/DevOps engineer should know.
- More...
The Project To Be Deployed.
The project to be deployed, is open and free to access. Visit this link to see and explore it.
N.B: This guide assumes that you already created an EC2 instance, and is ready for the API server deployment. In case you haven't and need a guide to go about that, check out this other article, in which I shared how to create an AWS EC2 instance from scratch.
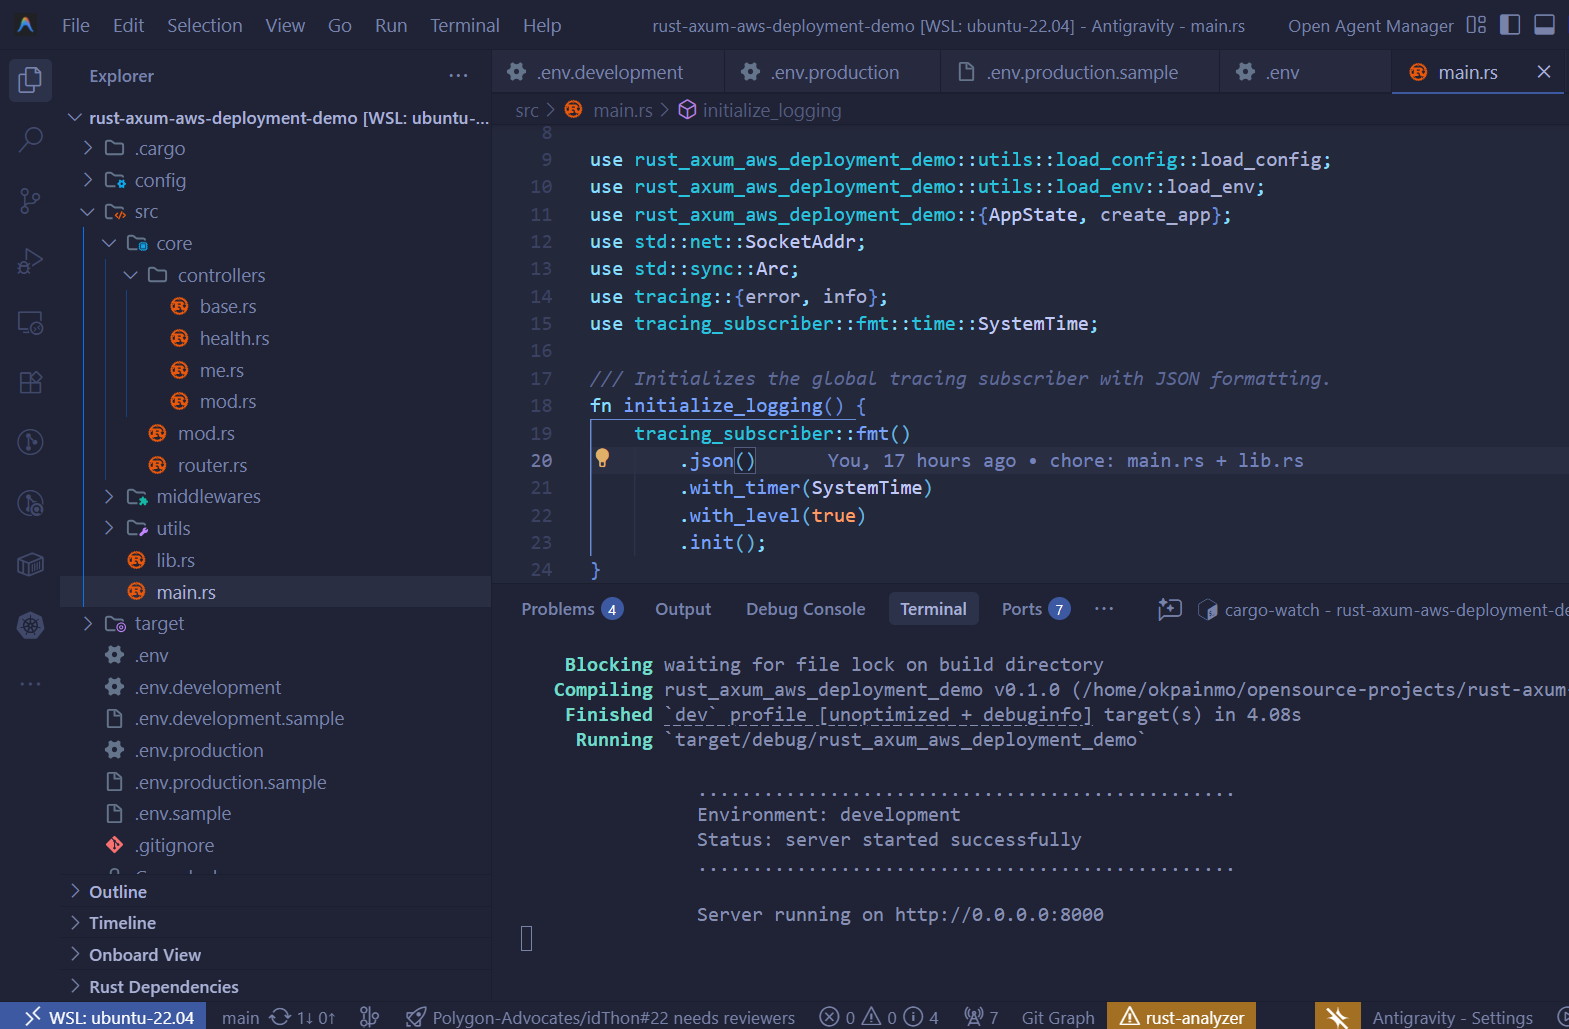
The below image is an IDE screenshot revealing how the API server looks on my local machine, and very much how its log output will look like after a successful deployment to the cloud.
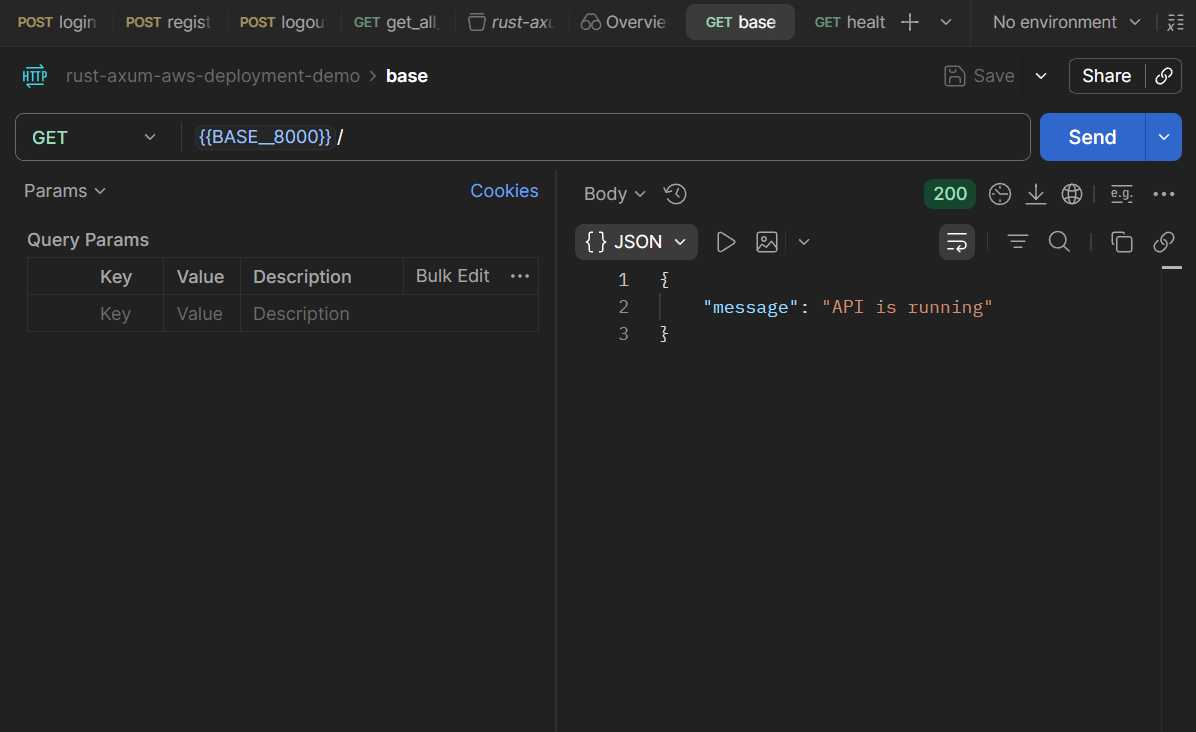
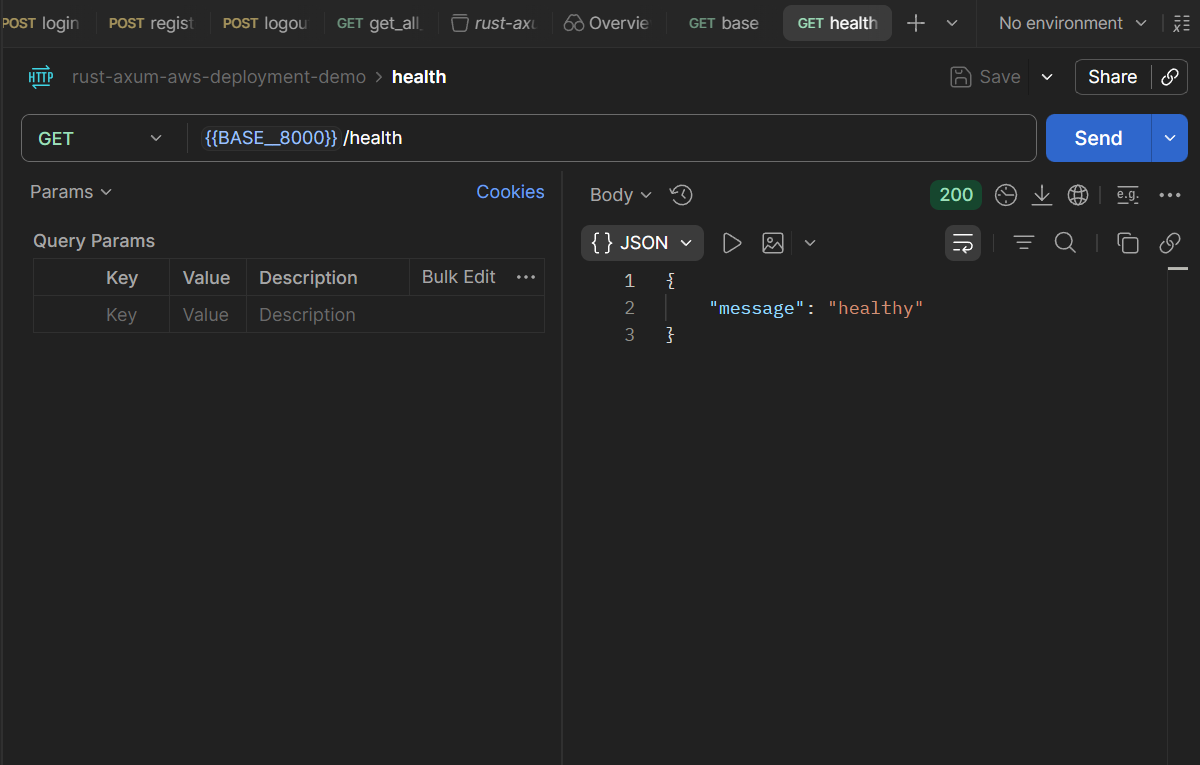
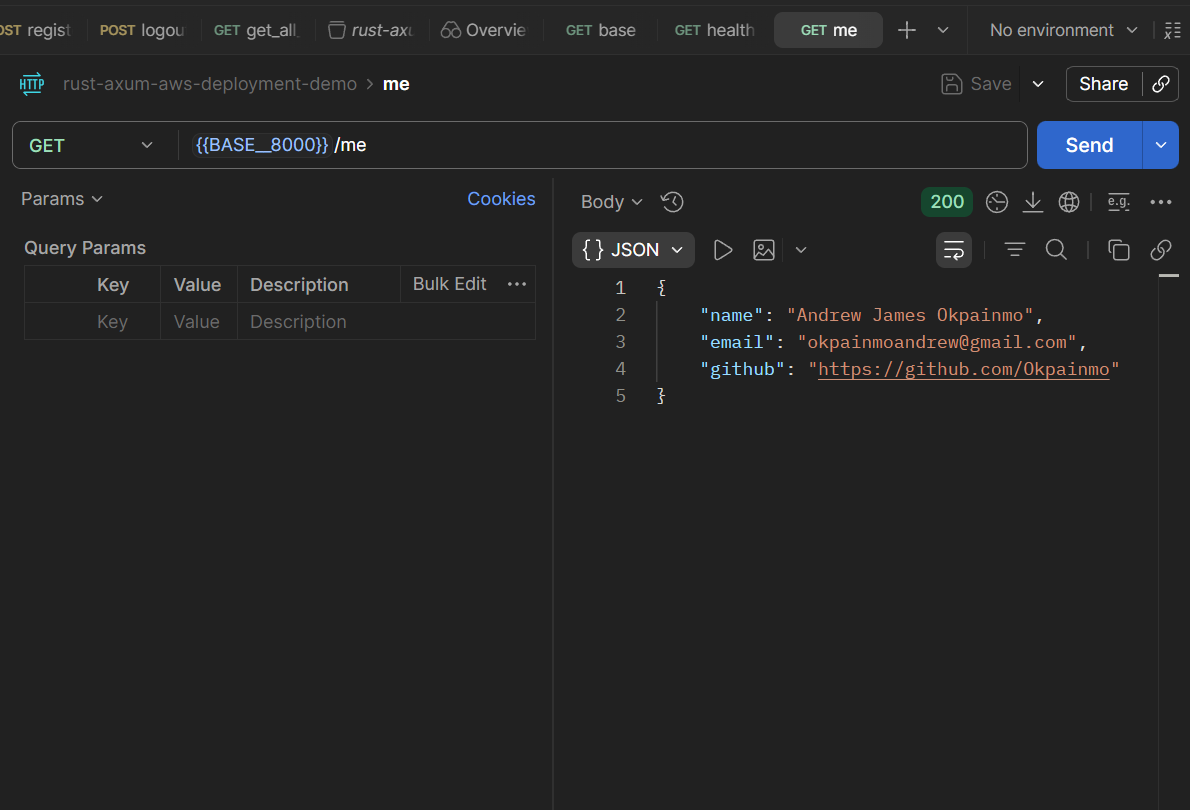
The three screenshots below, reveal Postman interfaces with three requests that were made on the local deployment of the API on my machine. Once done with our cloud deployment, we'll update the request URLs, and try out with the live one.
Let's Get A Todo.
- Why deploy binaries instead of running servers.
- Access The EC2 instance via SSH and perform system updates/upgrades.
- Build the project in release mode, and copy the needed files to the server.
- Create temporary .env files, and add in all the needed environmental variables(not very secure, we will make a clean implementation later on - step 11).
- Run the binary.
- Ensure all the necessary virtual machine ports(port "80" and port "443") are open.
- Install Nginx, and set up as reverse proxy.
- Get a free SSL certificate for project domain/sub-domain.
- Test the API server on the now SSL certified domain/sub-domain.
- Explaining what happens with the current setup if something goes wrong.
- Create a system service to run the project/API binary - along with a standard environmental variables setup. Follow-up, and delete the previously created environmental variables setup.
- Finish deployment, and test API server on the live URL - inside Postman.
Now, let's dive in.
1. Why Deploy Binaries Instead of Running Servers.
Regular high-level language server deployments(e.g Python/Node.js) usually involve preparing the target machine with the language's runtime environment, and then running the project's server using a process manager like PM2, or Systemd.
But Rust, being a low-level programming language, compiles to a native binary, which means the compiled binary can be run directly on the target machine without any need for an interpreter or runtime environment. This makes Rust a great choice for building high performance API servers, and also eases the deployment process.
2. Access The EC2 instance via SSH and perform system updates/upgrades.
Up next, let's access the EC2 instance via SSH and perform system updates/upgrades.
If you're using a key.
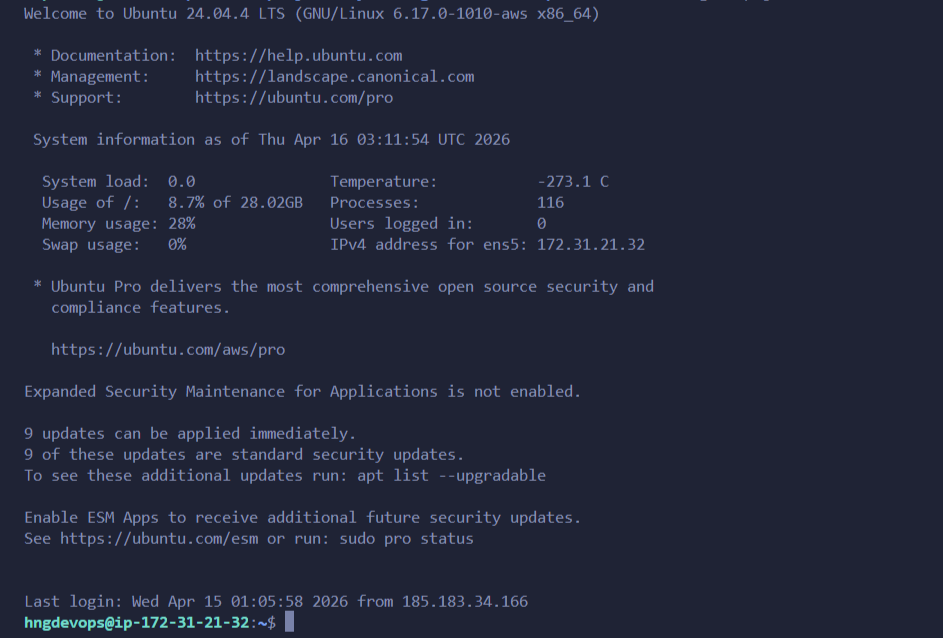
- Perform necessary system update/upgrades.
3. Build The Project In Release Mode, and Copy The Needed Files To The Server.
- Build for release - on your local machine.
- Ensure that you're in the project's root directory on your local machine, and that the project is already built in release mode. We will be copying both the config directory, and the compiled binary to the EC2 instance
Or as below, if you use a key:
4. Create Temporary Environment Variables Files, And Add In All The Needed Environmental Variables.
As stated earlier, this is not very secure. We will delete all the temporary .env files at a later step. For now, we simply need to
run the server temporarily and ensure that our progress is going well.
- Create a temporary
.envfile and add in it's content.
The base environmental variables file(
.env) - as seen in the project setup locally - is strictly for declaring the [current] working/deployment environment.
- Add the content:
- Save Nano and exit - CTRL + o then press Enter then CTRL + x
Same for the .env.production - which holds other relevant project secrets.
- Then
- Save Nano and exit - CTRL + o then press Enter then CTRL + x
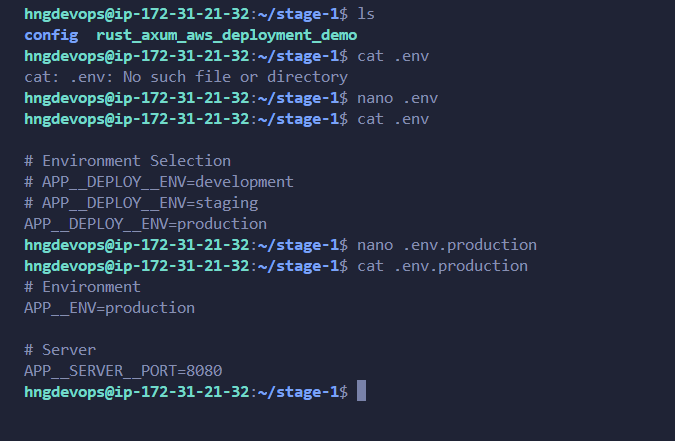
5. Run The Binary.
We're run the binary on port 8080 - as defined in the
production.envfile.
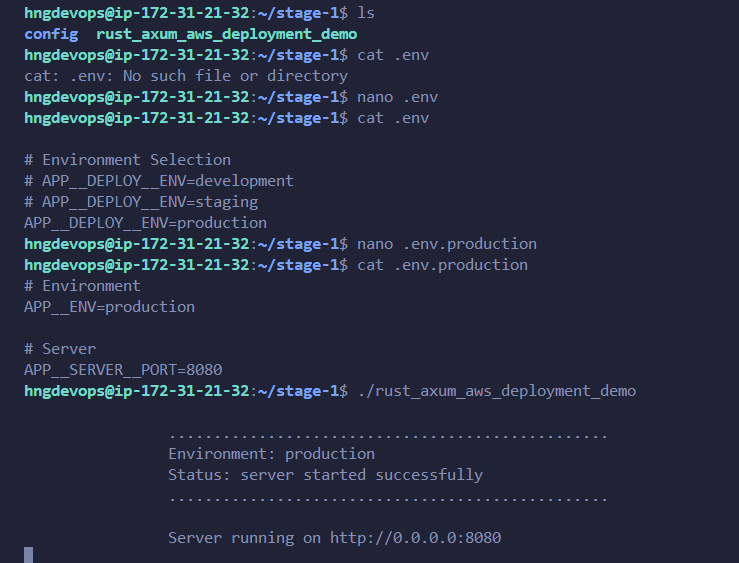
Great! the server runs successfully.
6. Ensure all the necessary virtual machine ports(port "80" and port "443") are open.
With the current set up, our API server(the binary) already runs internally on the '8080' port of our EC2 instance.
Now let's bring in Nginx, to help us implement reverse proxying and also get a free SSL certificate for our project domain.
But before we do that, let's ensure all the necessary virtual machine ports(port "80" and port "443") are open.
In case you want a more beginner-friendly guide that provides much detail - explaining the dynamics involved in opening and using custom VM ports, feel free to read this other article.
The steps below, details clearly how to open the necessary VM ports via the AWS EC2 dashboard. If you've implemented any low-level UFW
restriction(s) that affects any of those ports, ensure to also undo such.
- Proceed to your VM dashboard on EC2.
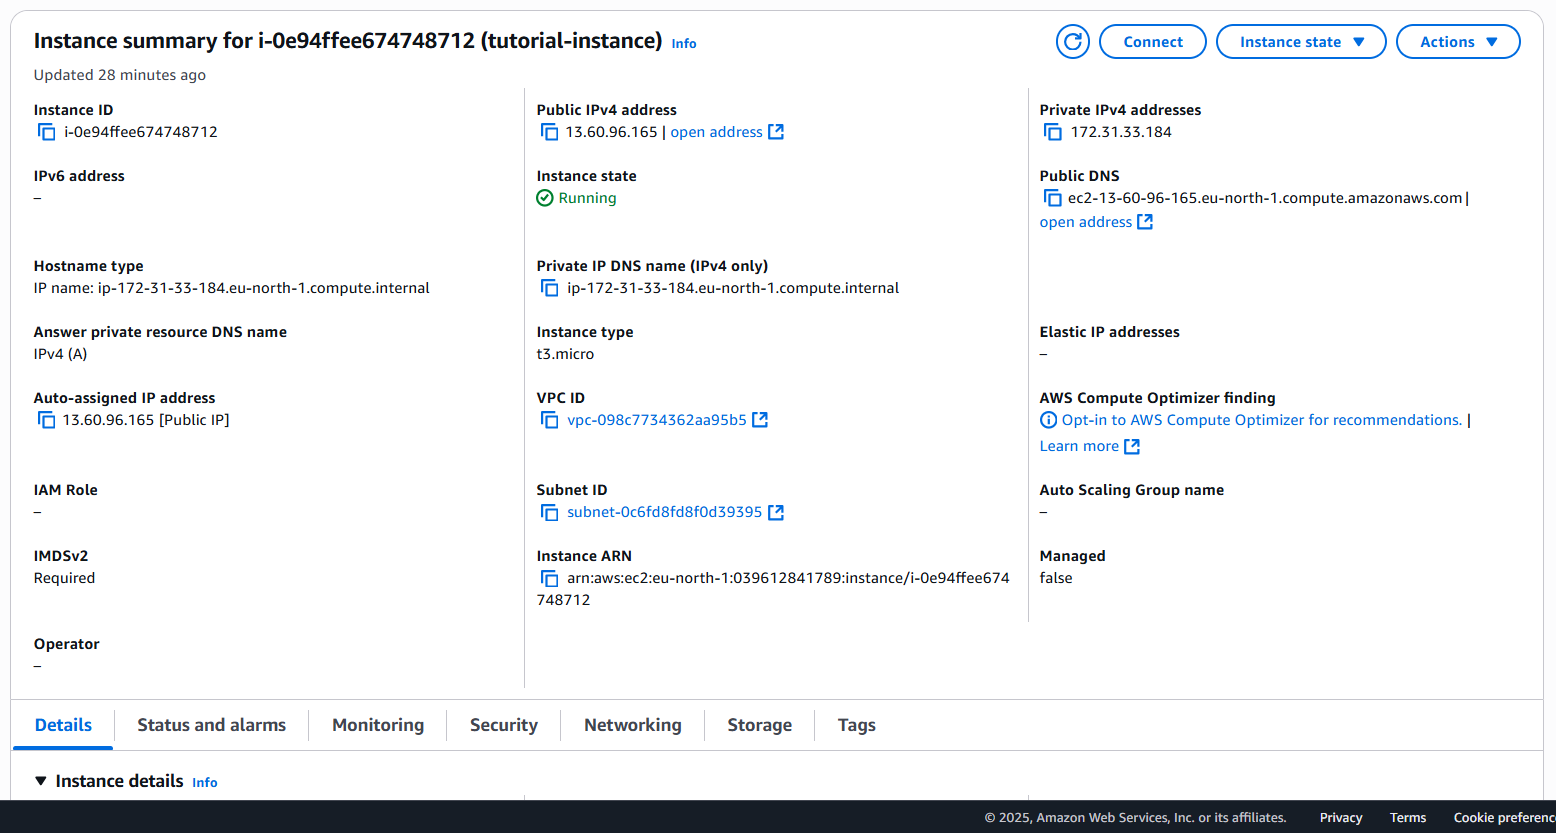
- Scroll to the bottom of your instance page, and click on security from the menu.
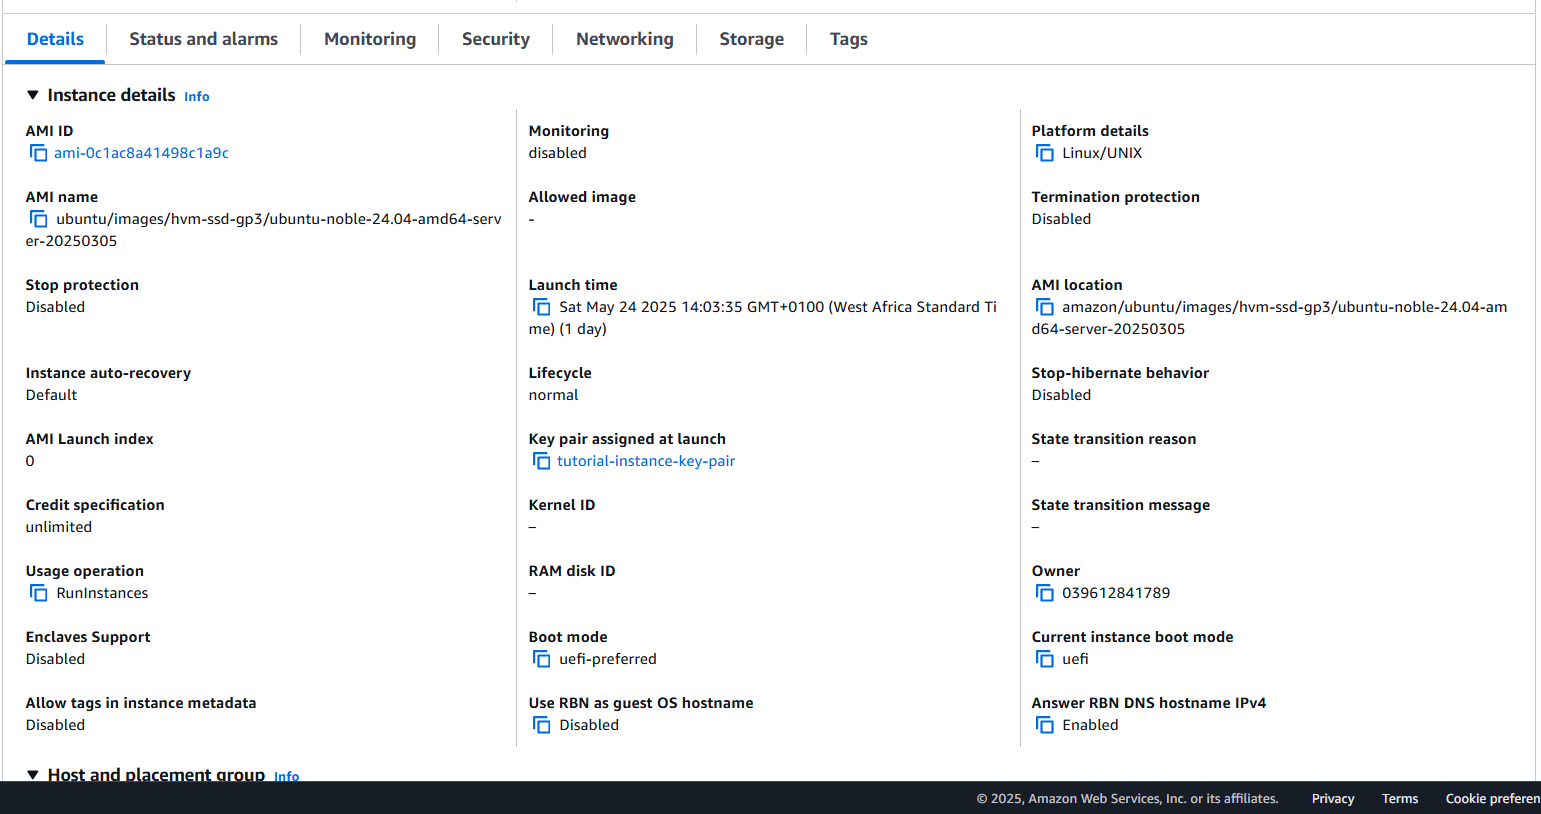
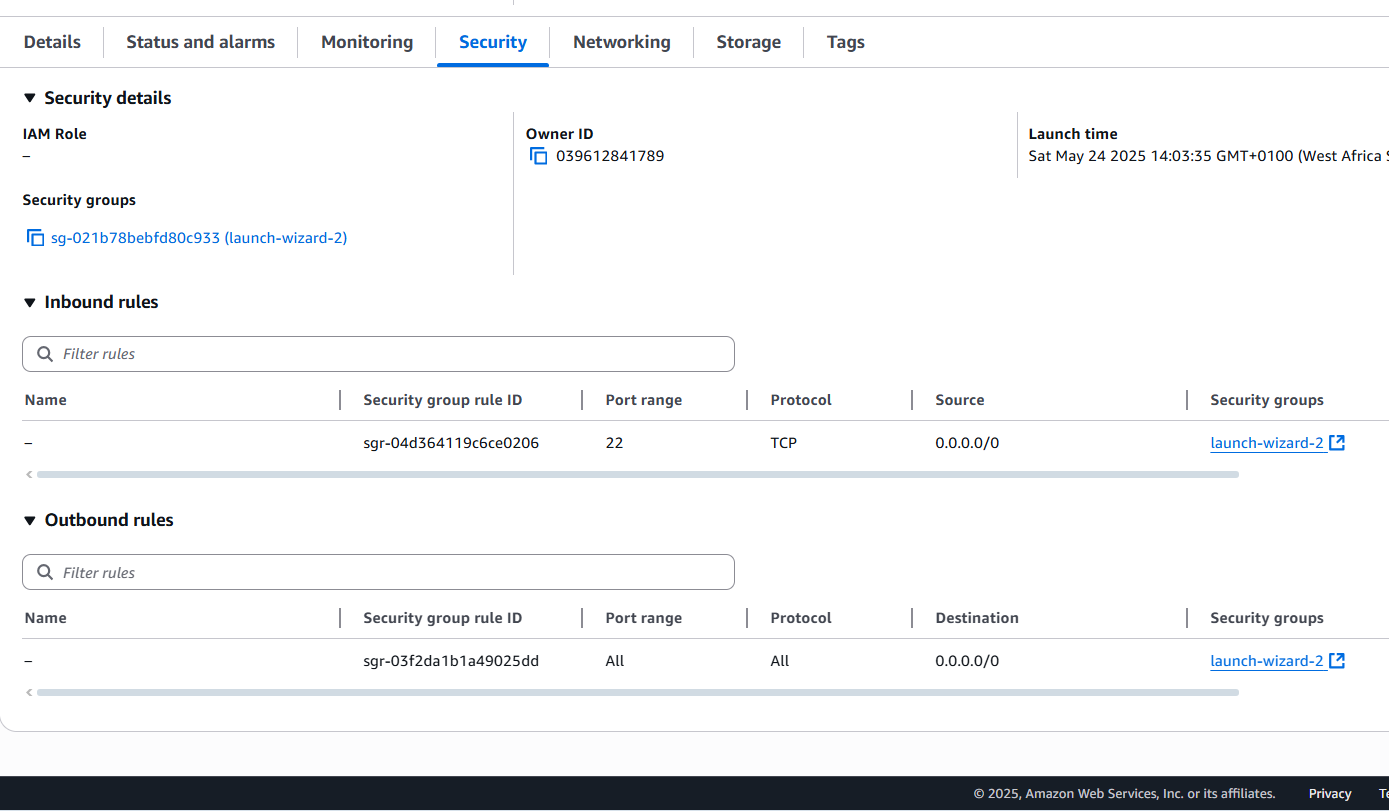
Locate the Security groups link ("sg-021b78bebfd80c933 (launch-wizard-2)" in my case) and click on it.
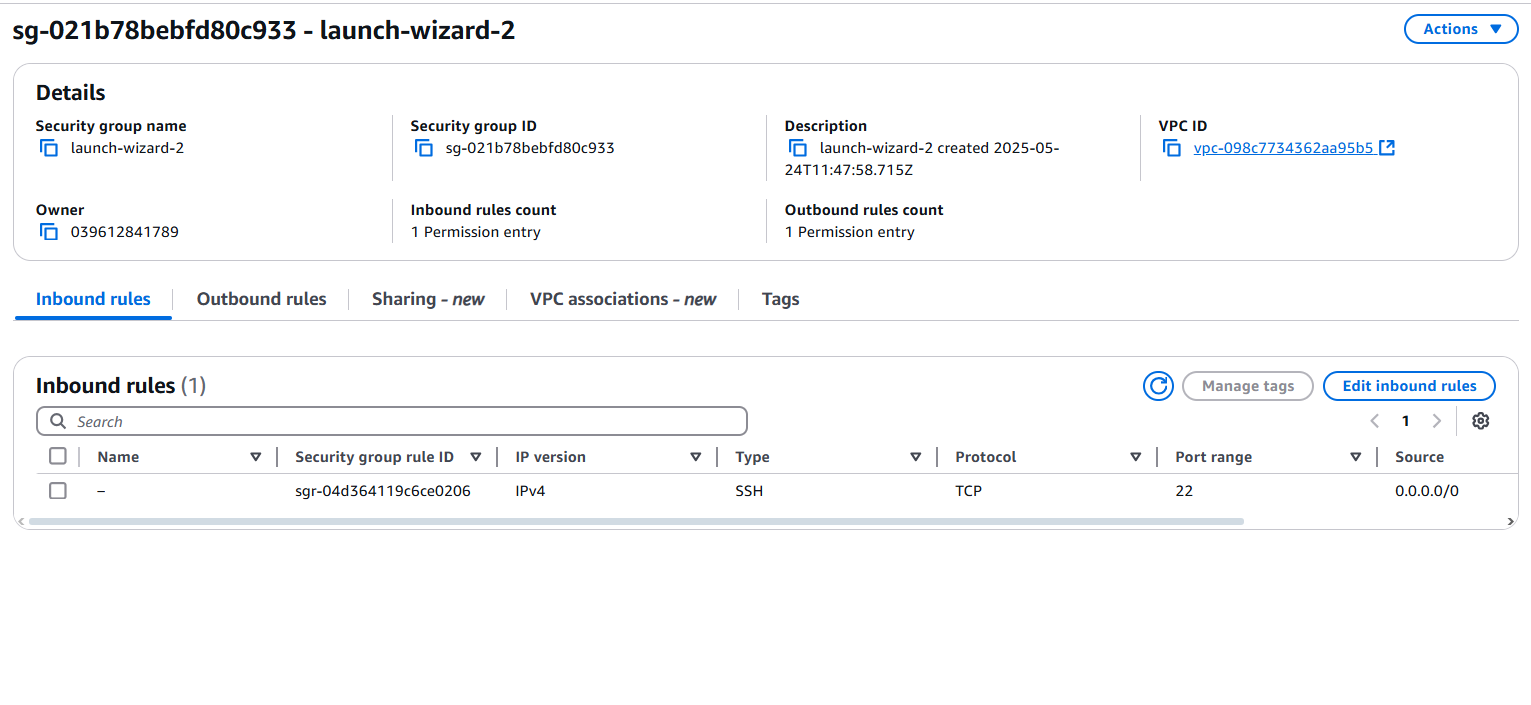
On the Inbound rules section, click on the Edit inbound rules button that is towards the right side of the screen.
Click on the Add rule button, and update to expose the VM ports 80 and 443.
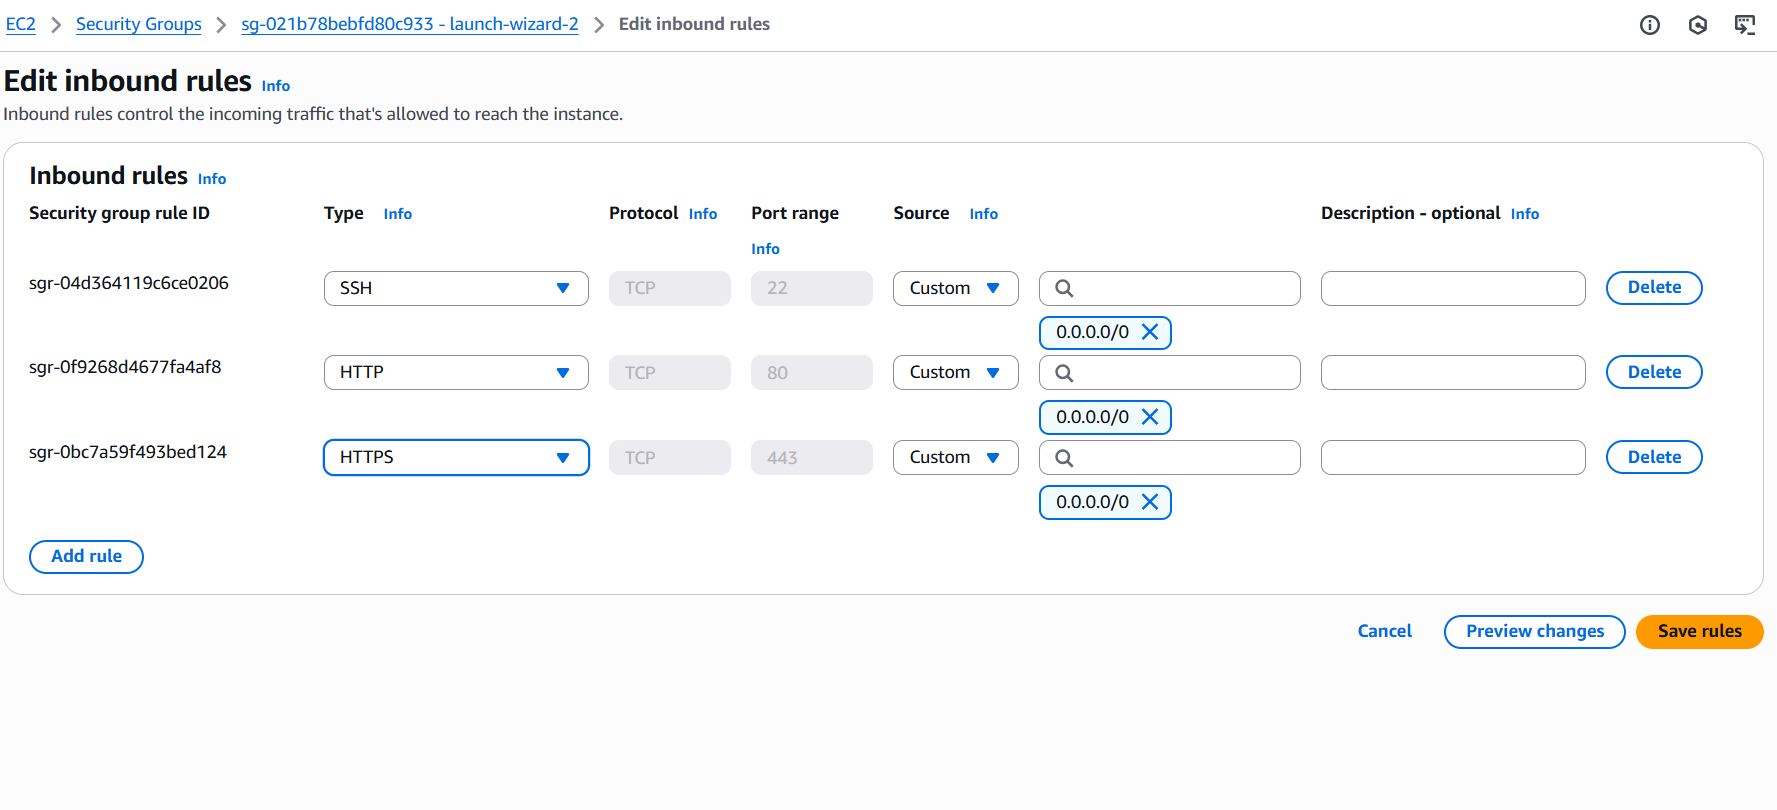
- Type: HTTP
- Port Range: 80(will be automatically selected)
- Source: Anywhere-IPV4
Then
- Type: HTTPS
- Port Range: 443(will be automatically selected)
- Source: Anywhere-IPV4
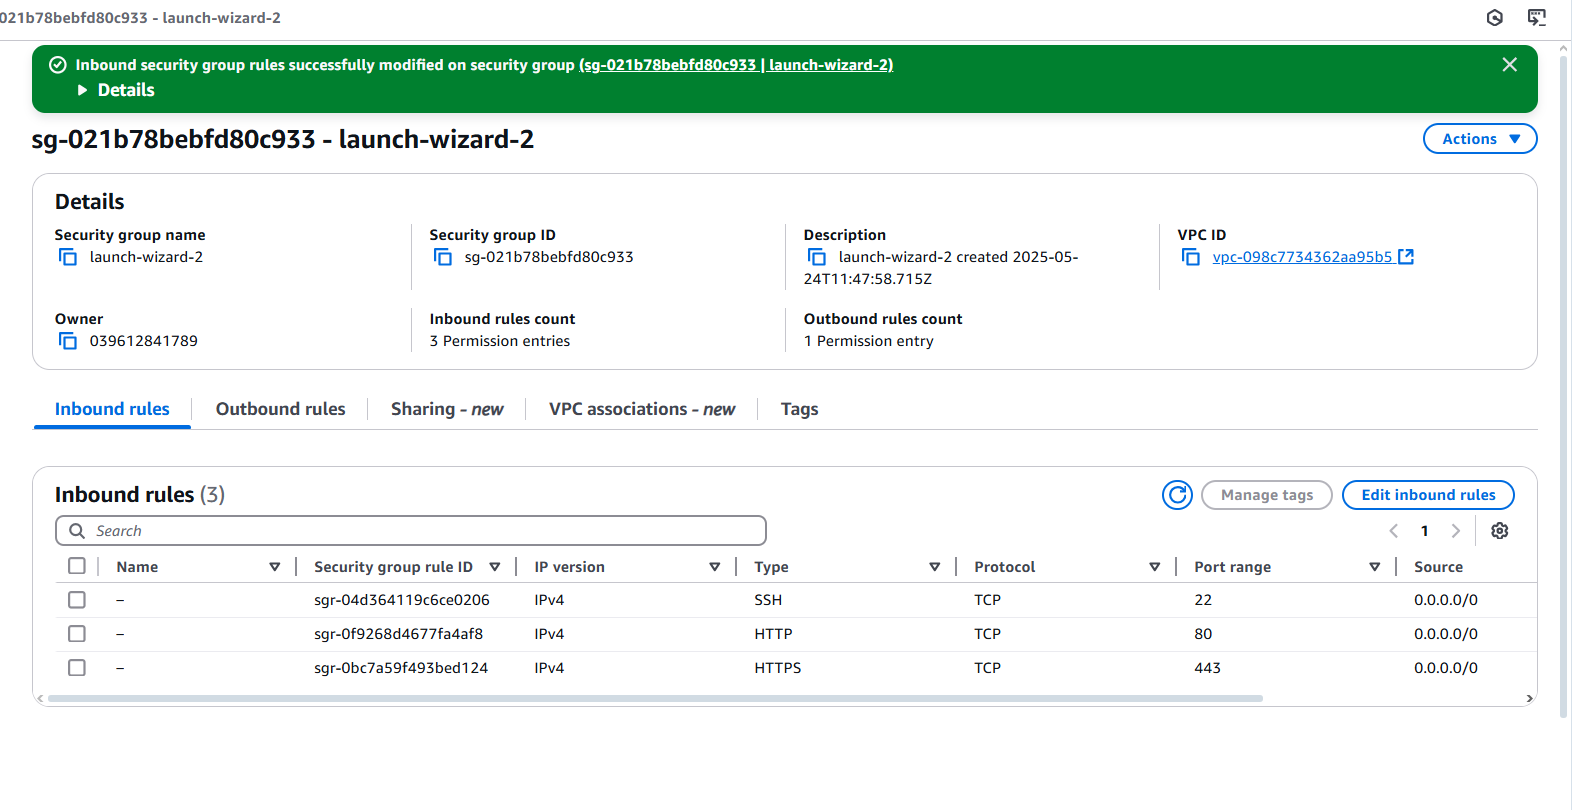
Note carefully that the access IPs for all the setup above is not very secure as it is set to permit access to any IP address globally(Source: 0.0.0.0/0). In a production environment, you would want to restrict IP access accordingly(e.g., granting access only to the servers that you expect connections from).
7. Install Nginx, and set up as reverse proxy.
Nginx (pronounced "engine-x") is a high-performance, lightweight web server and reverse proxy used to serve web content, handle load balancing, manage SSL, and route traffic efficiently.
Nginx use-cases:
-
As a web server – Serves static content like HTML, CSS, images, JS.
-
As a reverse proxy – Forwards client requests to backend servers (e.g. Node.js, Python, Rust, ...).
-
As a load balancer – Distributes traffic across multiple servers for better performance and reliability.
-
For SSL termination – Handles HTTPS encryption before passing traffic to your app.
-
Caching – Caches responses to reduce load on backend services.
When we install Nginx on our server, it sits in front of all direct http connections to our server. With that, we're able to re-route traffic internally with it - thereby having it serve the function of a "reverse-proxy". In our case, that means we'd then be able to redirect traffic to our VM port 8080 without needing to expose it directly.
-
Terminate the API server if it is still running - CTRL + c.
-
Install Nginx.
- Refresh/Reload the system service manager - run the below commands.
then
- Enable and start the Nginx service.
then
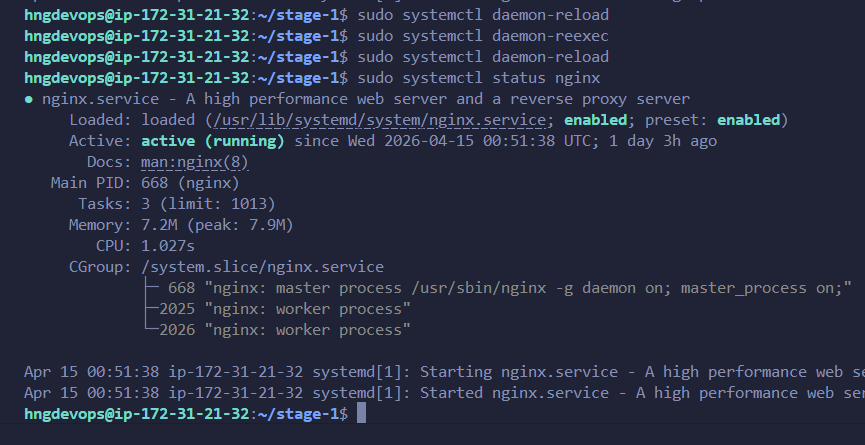
- Now view the status of the Nginx system service.
As can be seen below, Nginx is running perfectly.
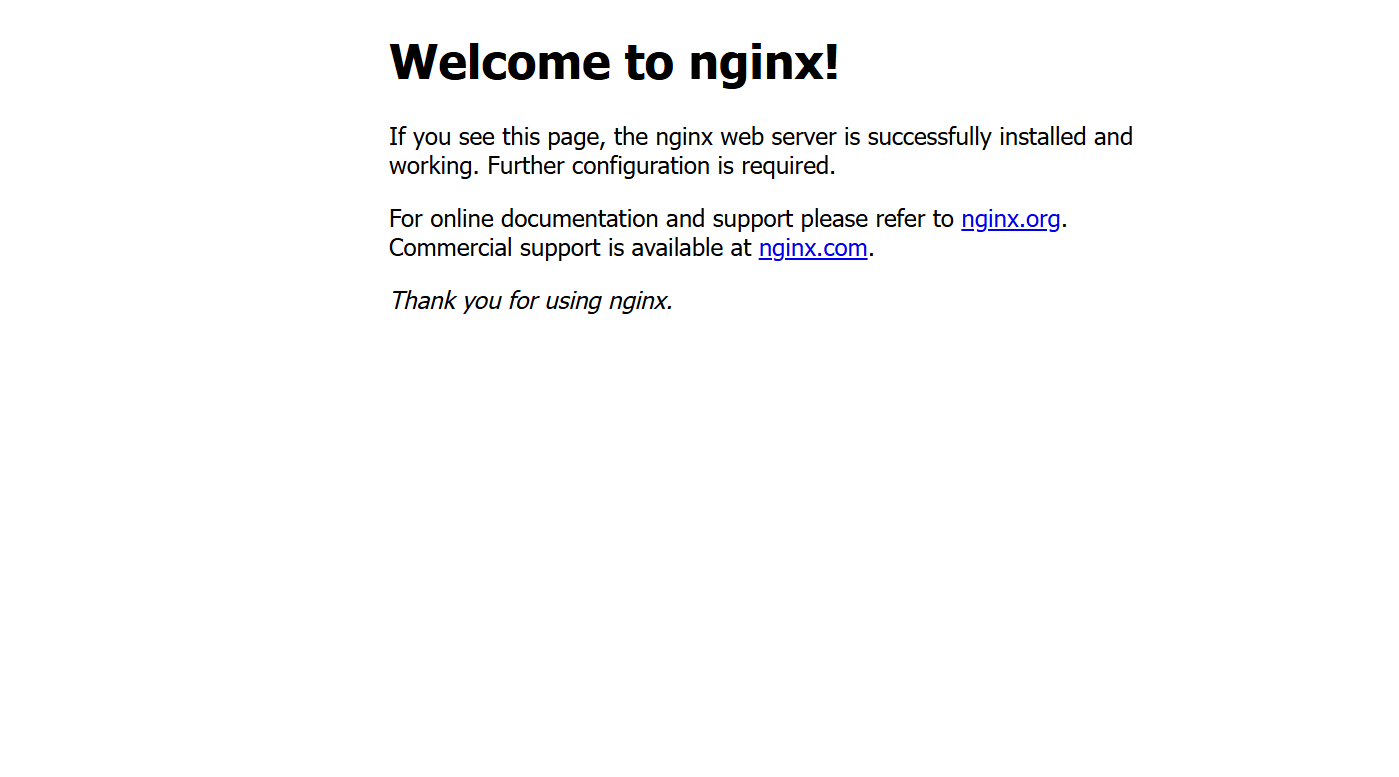
Now visit your VM address directly without the port(http://vm-public-ip-address).
You should now see a response like the one below - which indicates as earlier stated, that Nginx is now sitting in front and intercepting all http connections on our server.
Now that we have Nginx set up, let's configure it to handle routing to our port 8080 internally.
- Create a new config:
E.g.
- Paste this:
The
<your-domain-or-sub-domain>part on line 4 of the above Nginx config setup should be replaced with a real domain or sub-domain that you intend to obtain an SSL certificate for - later(step 8) in the tutorial.
-
Save and exit Nano - CTRL + o then press Enter then CTRL + x
-
Enable the config
E.g.
- Remove default site(important):
- Test the config:
If OK:
- Refresh/Reload the system service manager - run the below commands.
then
- Restart the Nginx service.
Now let's restart our API server and visit the VM IP directly just like previously(still without the port number), you'll see that instead of the Nginx home-screen that was initially showing due to Nginx intercepting our http traffic, we'll now be automatically re-directed to our API server.
That will mean Nginx is now serving as our reverse proxy.
- Rerun the binary.
- Now visit the IP address directly again(still without a port numbber) to verify.
8. Get a free SSL certificate for project domain/sub-domain.
As stated earlier, we already prepared Nginx to help us get a free SSL certificate for which ever domain/sub-domain you added in the config - thanks to Let's Encrypt.
In simple terms:
An SSL certificate is a digital file that:
- Encrypts data between a browser and server(HTTPS).
- Proves the service is real(identity verification).
- Uses a public-private key pair.
In a summary(and for what we want), it turns "http://" into "https://" - providing secure connection for http.
Before we proceed to get our SSL certificate, let's point our VM's public IP address to our domain so that we can receive traffic on it instead of using the IP address. Nginx will fail to provide the SSL certificate if that is not done first.
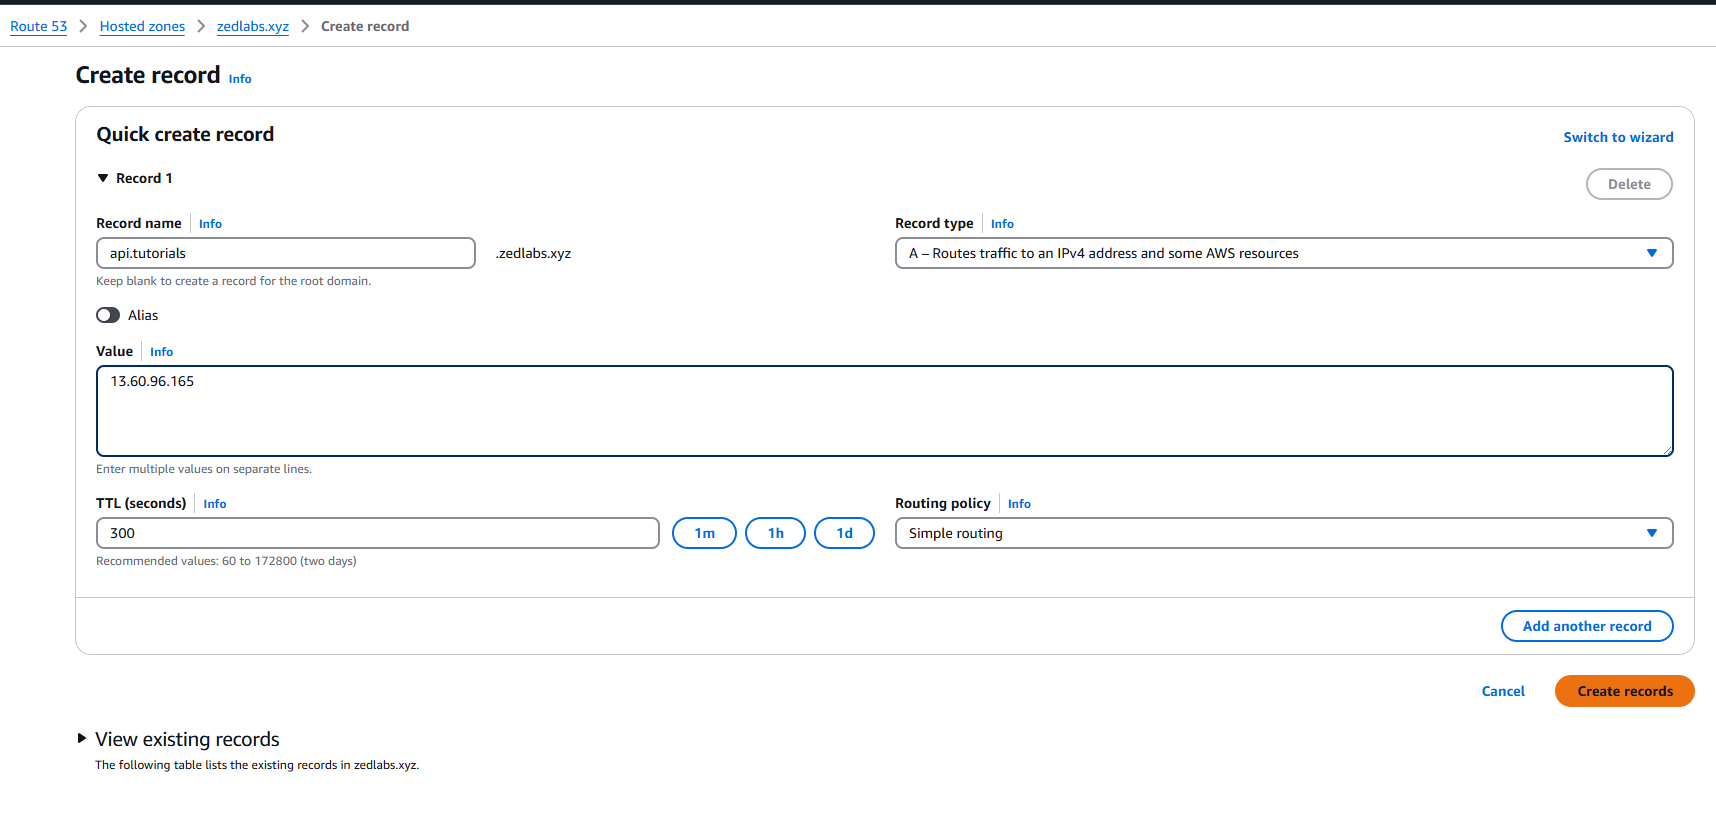
To do that, simply go to where ever your domain is hosted, and create an "A" DNS record that points your domain/sub-domain
to the VM IP address.
My domain is currently hosted on AWS Route 53.
Route 53 is AWS' DNS management service. The screenshot below shows how to create an
ADNS record on the Route53 dashboard.
- Next, run the below command to install certbot
Next, run:
You'll get some prompts. Proceed to respond to them appropriately.
If everything goes well, you should then see a success message as confirmation.
Congratulation!!! You just successfully got a free SSL certificate for your domain/sub-domain.
9. Test the API server on the now SSL certified domain/sub-domain.
- Refresh/Reload the system service manager - run the below commands.
then
- Restart the Nginx service.
- Check the Nginx service status.
- Restart the API server server
Now return to your browser, and try out an "https" connection with you domain/sub-domain. It should work just fine.
10. Explaining what happens with the current setup if something goes wrong.
With the current setup we have, while our API binary deployment can keep running since the VM will always be up, what happens if a breaking-error occurs on it. What happens if something terrible goes wrong.
If any such issues come up, our API server will simply crash with no system in place to restart it.
That is where a tool like Systemd comes in handy once again. If we were making a Javascript/NodeJs deployment, an alternative tool we could use is PM2. Systemd remains the mode robust option either way.
We'll now need to create a system service to ensure that the API server is always up.
11. Create a system service to run the project/API binary - along with a standard environmental variables setup. Follow-up, and delete the previously created environmental variables files.
- Run the below command to initialize the creation of the system service using Nano.
- Add the following into the Editor.
- Save and exit Nano - CTRL + o then press Enter then CTRL + x.
The above Systemd service file defines how to run the API binary as a persistent background service on Linux. it tells systemd how to run, restart, and manage the API binary deployment as a reliable, self-healing background service.
15. Finish deployment, and test API server on the live URL - inside Postman.
Now that we have our system service all set, let's create the environmental variables file that will work on the service. As seen in the service file content above, our environmental variables which will be injected into the project by Systemd, will stay in a secure/secret location - "/etc/secrets.env".
Keeping our environmental variables off the project root, provides better security for valuable project credentials. Feel free to add the file to any location you feel will be most secure.
- Open the file with Nano.
- Add all the content of the initial
".env.production"file into it.
-
Save and exit Nano - CTRL + o then press Enter then CTRL + x
-
Now delete all the initial env file we created(ensure to be on the project root).
- Ensure that the deletion was successful.
You should see that the files no longer exist.
- Refresh/Reload the system service manager - run the below commands.
then
- Enable the API server system service.
- Start the service.
- Check the service status.
As can be seen in the system service log below, your deployed Rust API(binary) is now successfully running as a system service.
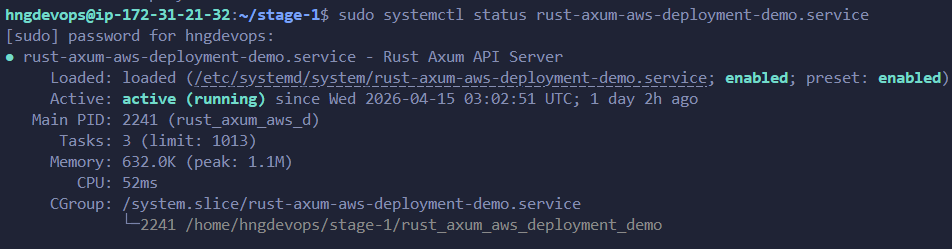
Our API should also be responding perfectly on the secure url when called via a browser or an API client like postman.
With this setup, whenever something goes wrong, the service will attempt to restart the API server without needing any manual intervention.
- View the API server system service logs whenever you need to.
Or
Now let's proceed to postman, and test the API end-points with the live URL.
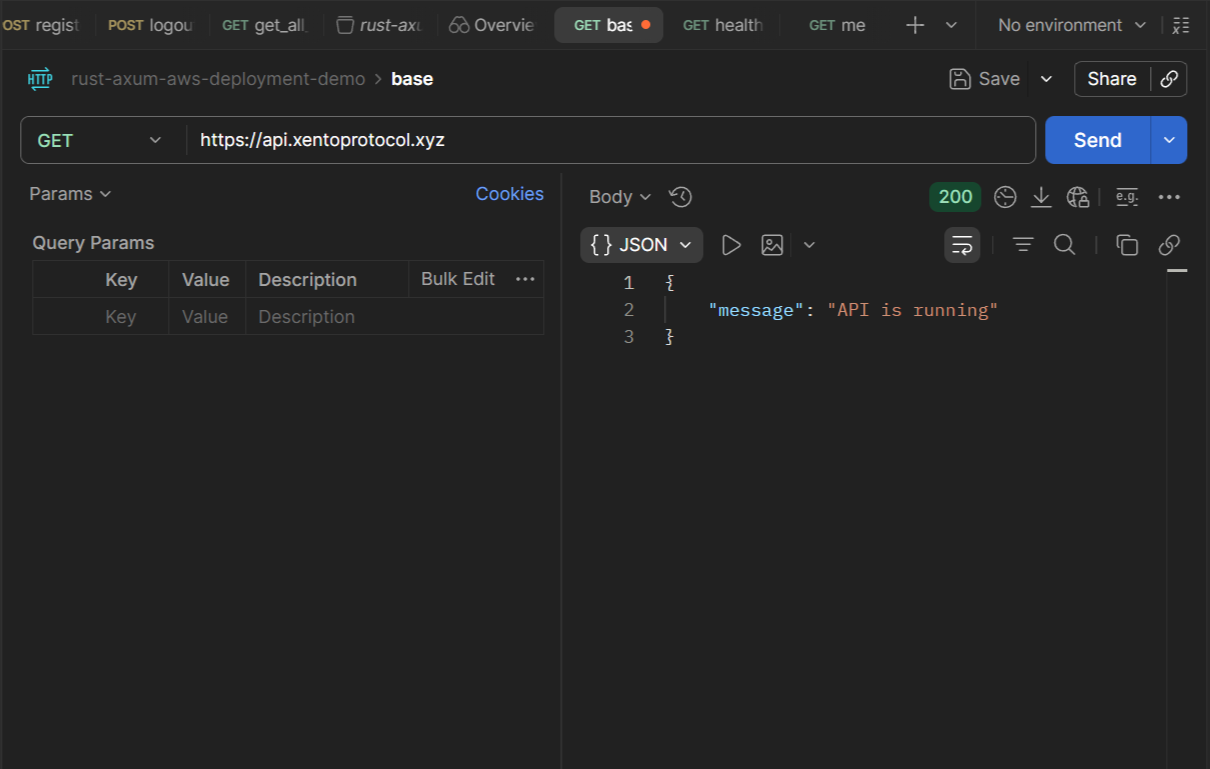
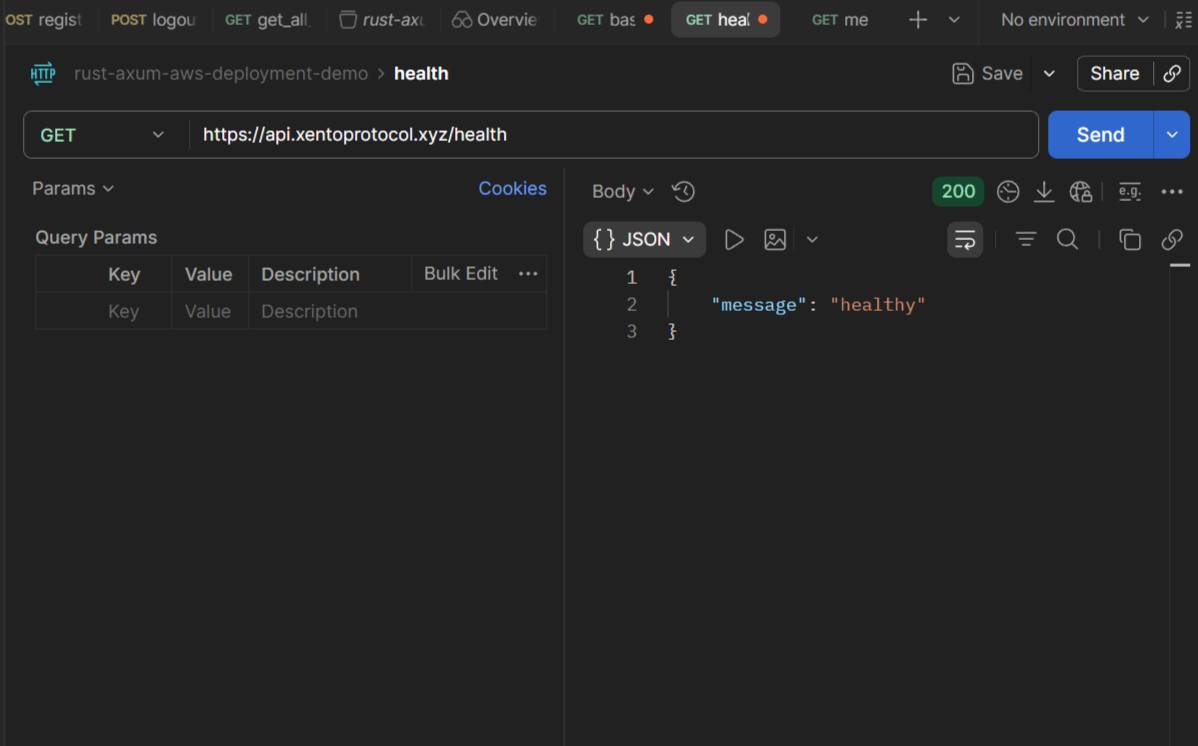
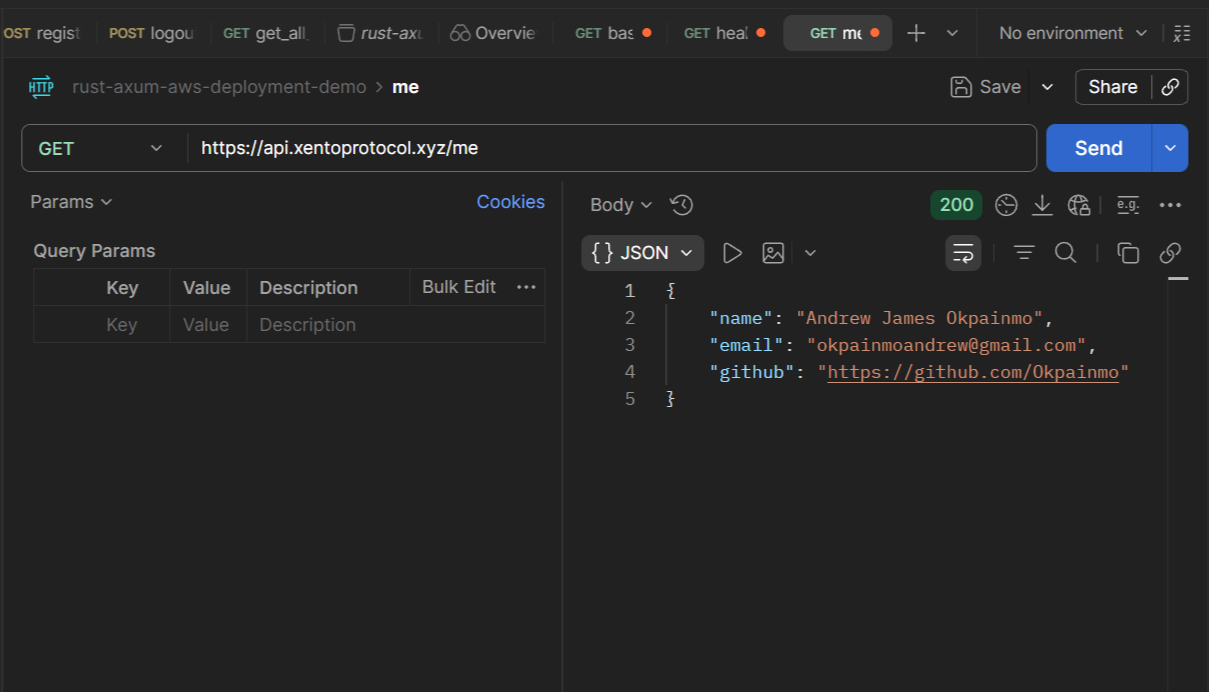
Great if it all works perfectly!!!
And with that, you just successfully completed a highly professional Rust API binary deployment on AWS EC2.
The limitation of this kind of cloud deployment.
While this API server deployment is honestly a feat on it's own, it is still quite limited, and cannot meet the needs of a very professional engineering team whose demands can be only be met by more advanced DevOps workflows.
With this current implementation, on every code/deployment update made to the project repository, the engineer in-charge still needs to:
-
log into the EC2 instance, to pull in the updates.
-
Restart and view the status of the system service.
-
As I'll recommend, also restart and view the status of Nginx.
All of these processes are not ideal, and can be really tedious for engineers while also slowing down execution for the whole team.
Conclusion.
That would be it for this article.
It's been quite a lot in this guide, I do hope you found much value.
Thanks for reading, see you in the next article.
If you loved this post and would want to send an appreciation, simply use this link to buy me a cup of coffee.
Cheers!!!
