
 Image Credit: ©Vicky Design via Canva.com
EC2 remains one of the most critical AWS cloud services currently available!!!
"Elastic Compute Cloud" popularly known as "EC2", is an AWS cloud services that lets you rent a virtual computer(called an "instance") and perform actions on it — just like you would on your own computer, but in the cloud.
AWS EC2 simply has to do with creating/provisioning and managing servers/virtual machines in the cloud. With an AWS account, you simply create the virtual machine, get access to it from AWS, then connect to it remotely and use it as intended.
Some EC2 use-cases include:
-
Hosting a website.
-
Deploying API servers.
-
Running databases.
-
Training machine learning models.
-
Setting up CI/CD servers.
More...
The next couple of articles on the Zed Labs blog, are cloud and DevOps contents that will be quite heavy on using AWS EC2. Hence I though to create this stand-alone guide, to share how to create a new AWS EC2 instance and gain access into it for performing tasks on the cloud.
In this piece:
- You'll learn how to create/provision a new AWS EC2 instance.
- You'll get to discover the different ways I recommend to access and use your EC2 instance.
Let's Dive in.
Creating the EC2 Instance.
-
Log into your AWS account, and select EC2 from the list of available services.
-
On the EC2 home dashboard, look out for any button that says "Launch Instance", and click on it.
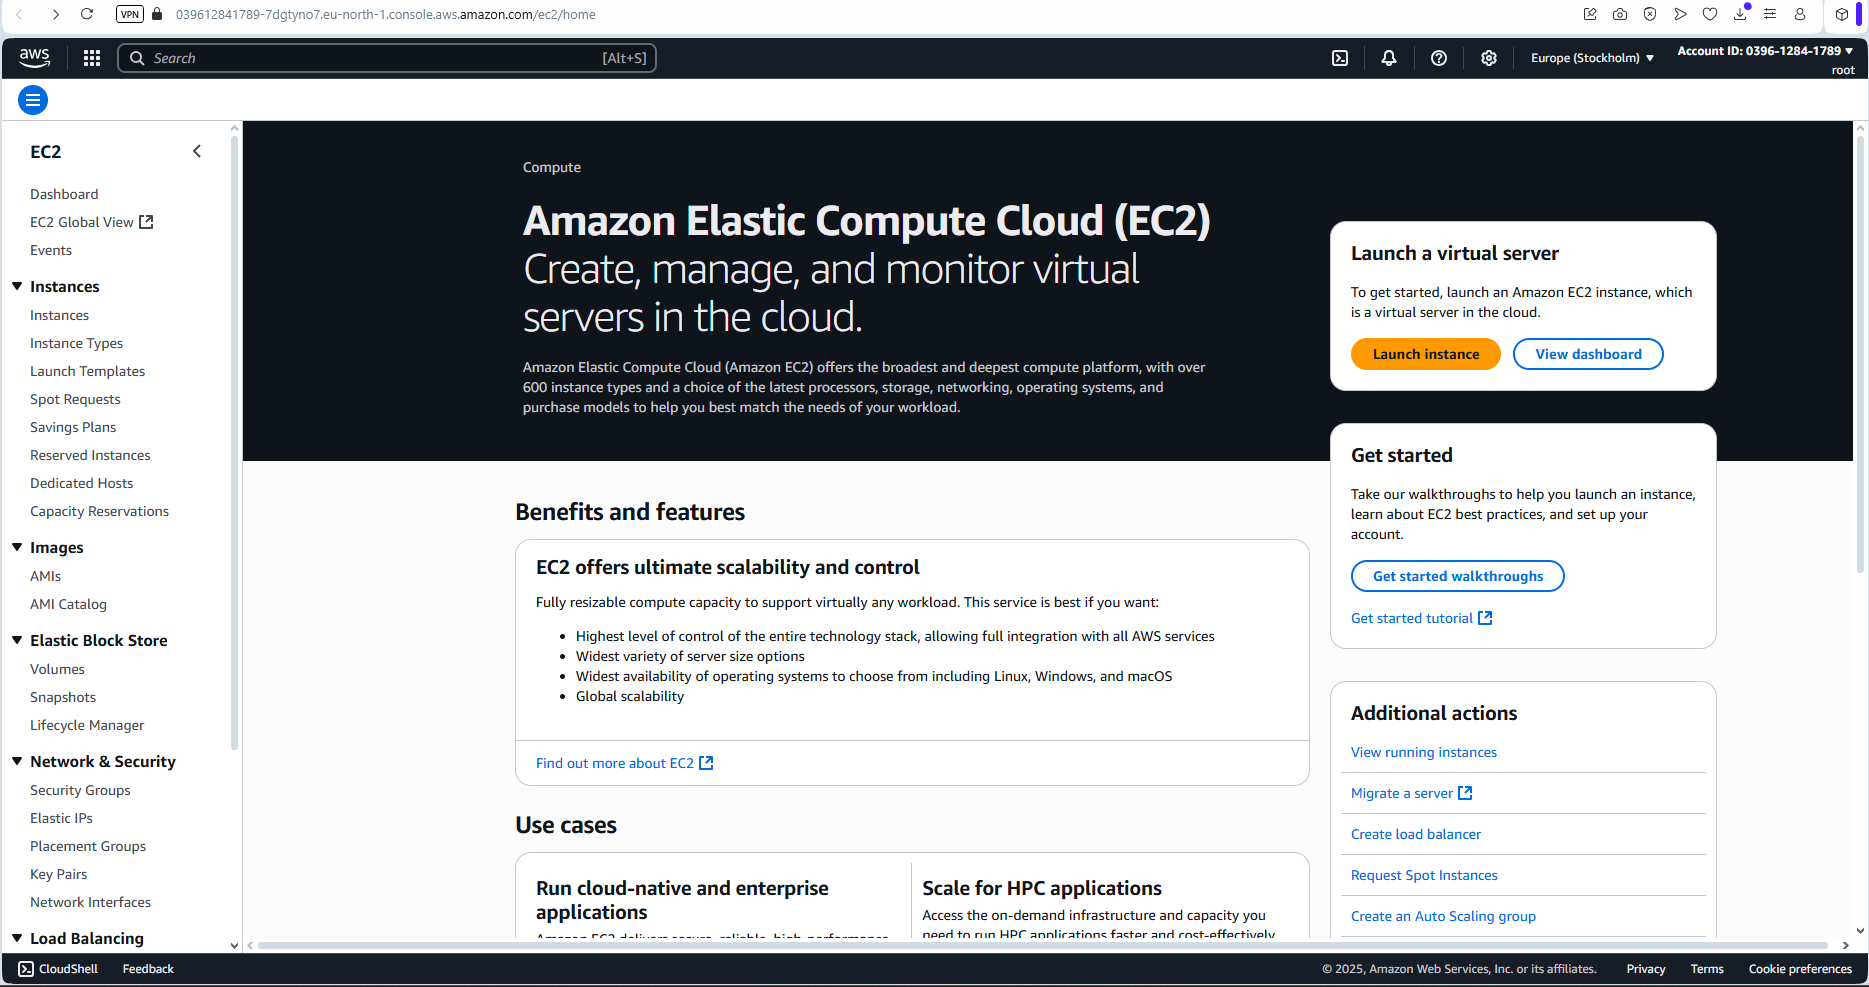
You should be brought to a screen that looks like the one below.
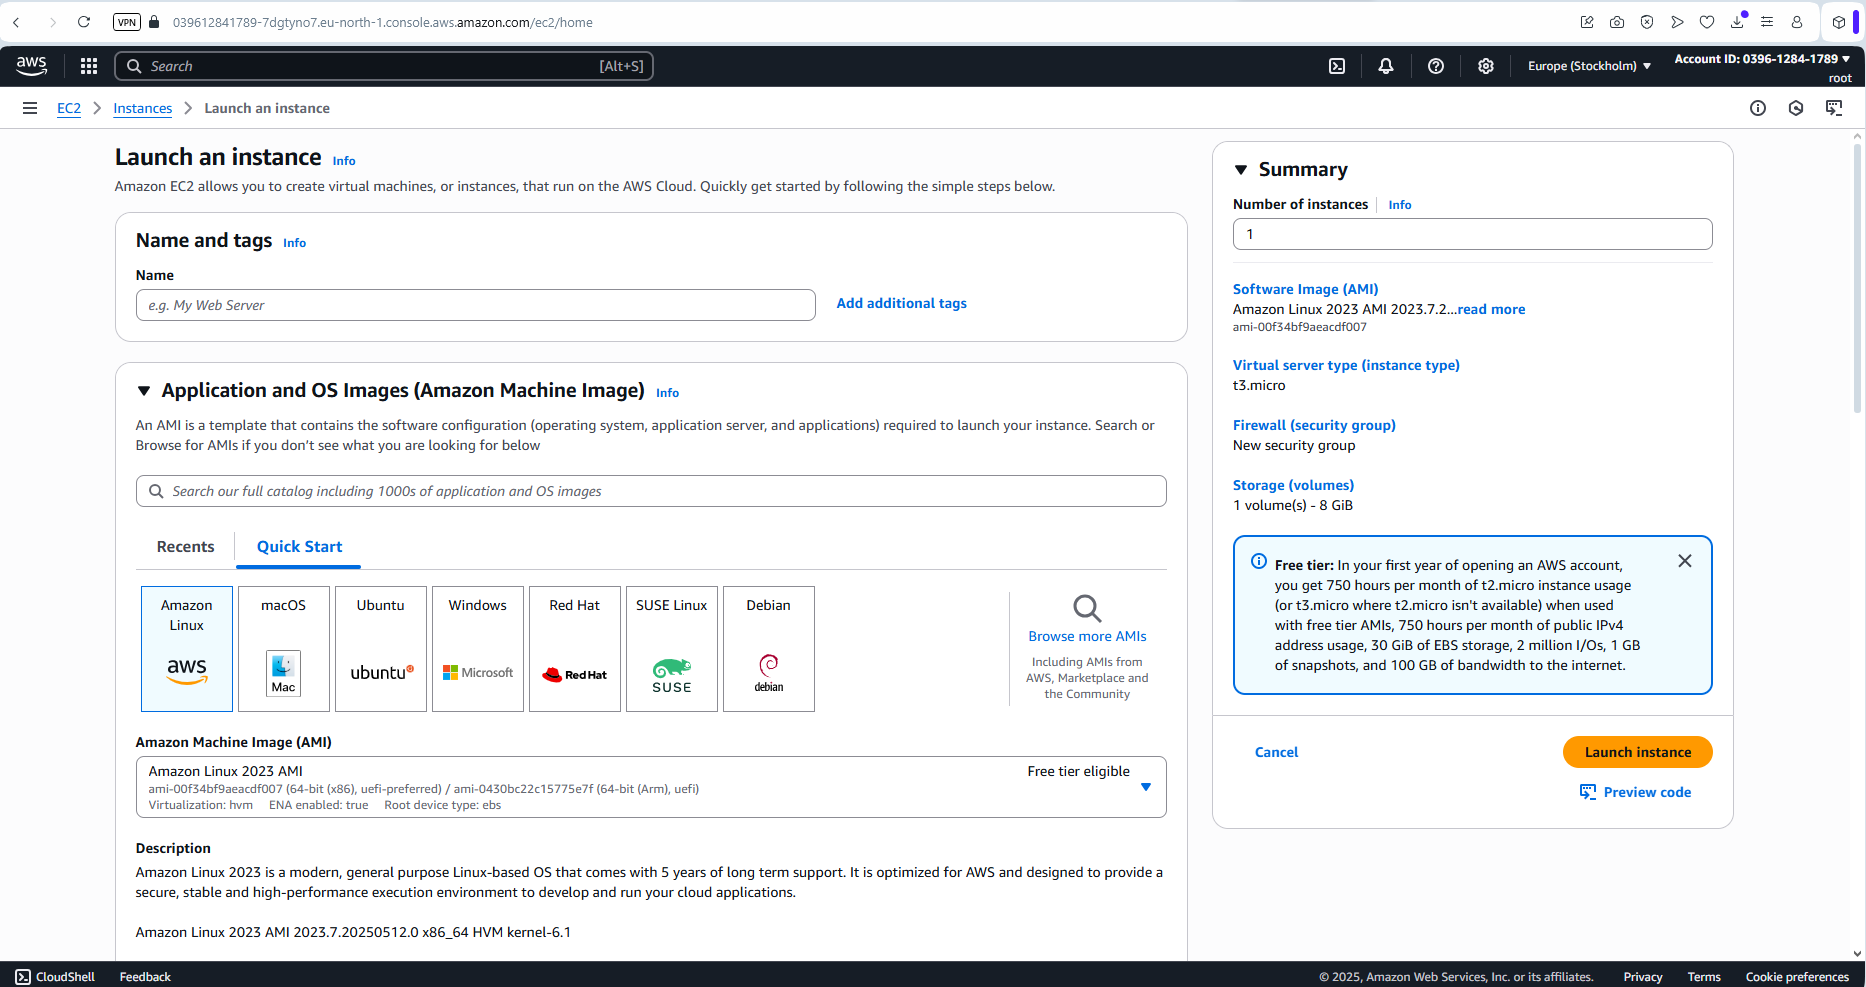
Now proceed to setup the instance.
1. Name and tags.
Simply give your server a name that resonates with your project - I'll call mine "tutorial-instance".

2. Application and OS Images (Amazon Machine Image).
- OS: Select "Ubuntu".
Ubuntu operating system(OS), is arguably the most used for virtual machine deployments around the world. With much usage by the community, and it's track record of excellent functionality, you're sure to have both reliability, and access to community assistance(especially in the form of tutorials and guides) in case anything goes wrong.
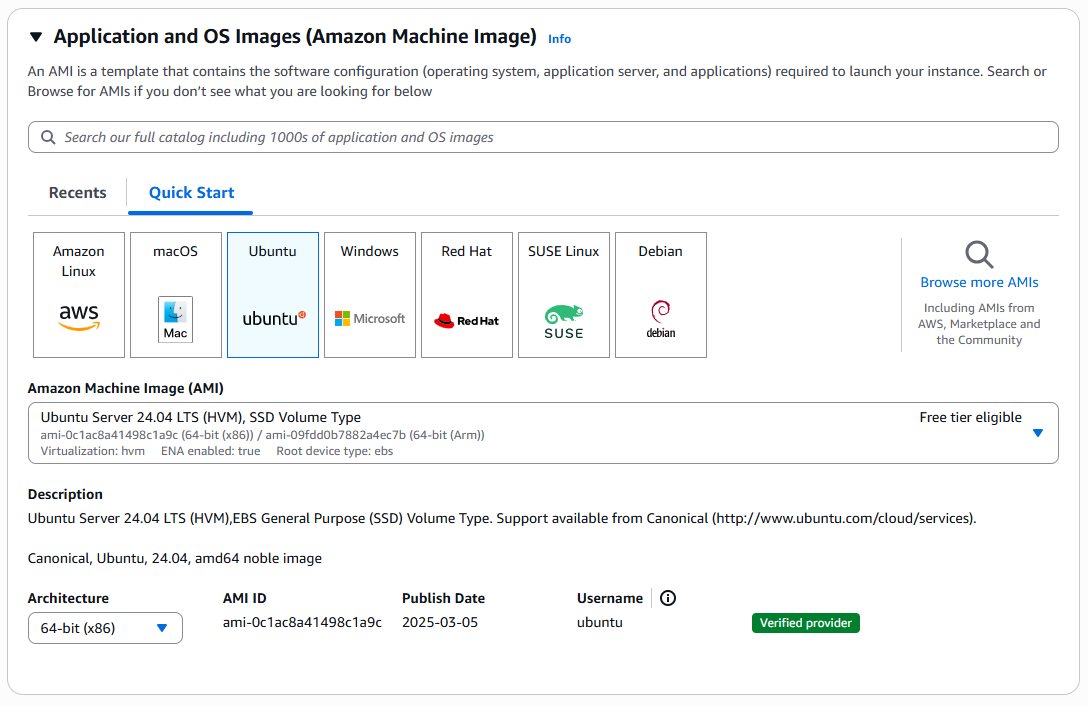
- Amazon Machine Image (AMI): Select the latest Ubuntu AMI that is free-tier eligible from the list.
When writing this article, the latest with free-tier support(which I'll be going with), is Ubuntu Server 24.04 LTS....
If you're building a standard and well-funded project, then feel free do a research, and select a more standard AMI option that matches your project demands from the list.
Note carefully how the various AMIs are for different applications - with a number of them being for AI use-cases. Ensure to make the appropriate selection that matches the current project needs.
Either way, the free-tier AMI should do for quite a lot of applications/use-cases.
- Architecture: Ensure that 64-bit x86 is selected.
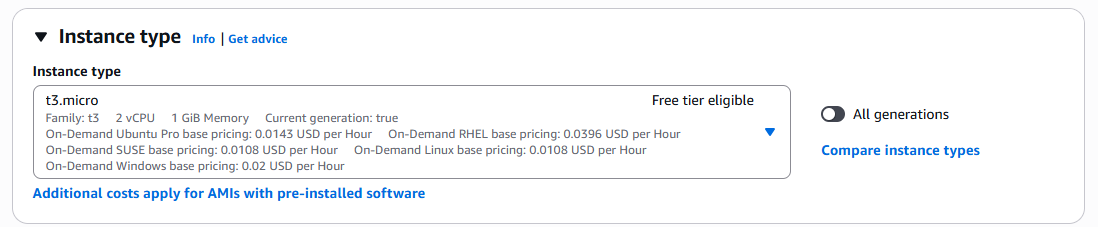
3. Instance type.
This is a very important section, as it has to do with different important aspects like:
- The virtual machine specs(CPU) and RAM.
- The instance cost.
Same as for the AMI, simply go with the highest spec that is free-tier eligible. If you're working on a funded project, do your research, and select the perfect fit for the project requirements.
For this tutorial, I'll go with the free-tier t3-micro instance type.
4. Key pair(login).
This section is also a very important one.
A key-pair is simply what helps to grant you remote SSH access into the server/VM to be created.
Read this recent Zed Labs Blog Article on how public key SSH authentication actually works, to learn and understand what happens under the hood when you attempt an SSH connection with the key pair that will be created.
Now back to the main talk.
Select Create new key pair just beside the drop-down menu.

Proceed to make the below selections on the resulting pop-up to create you key-pair.
Feel free to select an older key-pair from the drop-down menu if you or your team already have previously created ones. I recommend creating a new one for your current connection.
-
Key pair name: simply add any name that fits. Mine is "tutorial-instance-key-pair".
-
Key pair type: select ED25519.
The image below shed light on why to chose which from the two available options.
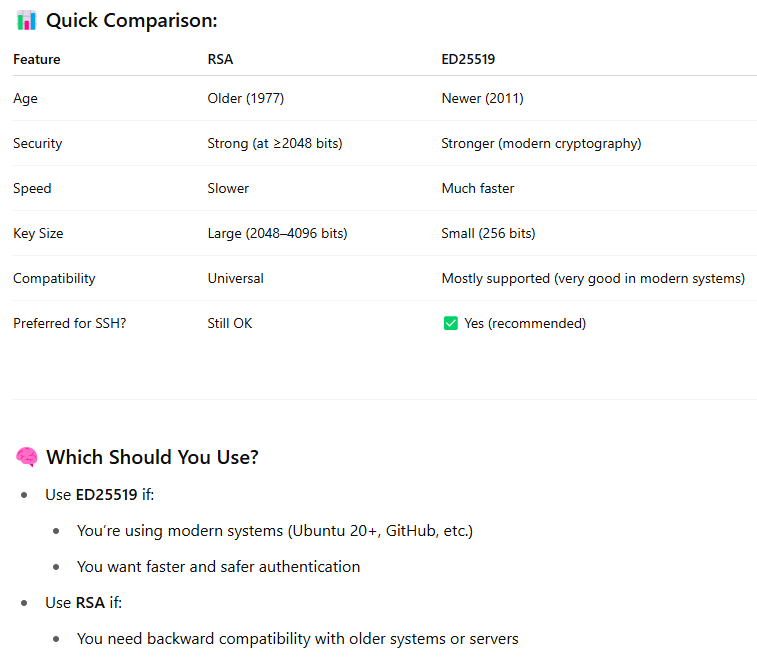
Note that the selection to be made, is affected by both the machine you'll be connecting from, and the VM to be created. Our instance(VM) to be created, is a modern server, and I believe your local machine is not an 'old-lady' either, so ED25519 - since it's more modern and secure, should do.
Feel free to select the other option if you'll be connecting from an older device that may not support the ED25519 cryptographic algorithm.
- Private key file format:
- If you'll be connecting from a shell client that has OpenSSH installed: use .pem.
- If you'll be connecting from PuTTY: use .ppk.
Select .pem since that matches the environment that I'll be connecting from in this guide. Your code editor terminal and other modern shell interfaces, should work perfectly with .pem as well.
Next, click the button, and create the key-pair.
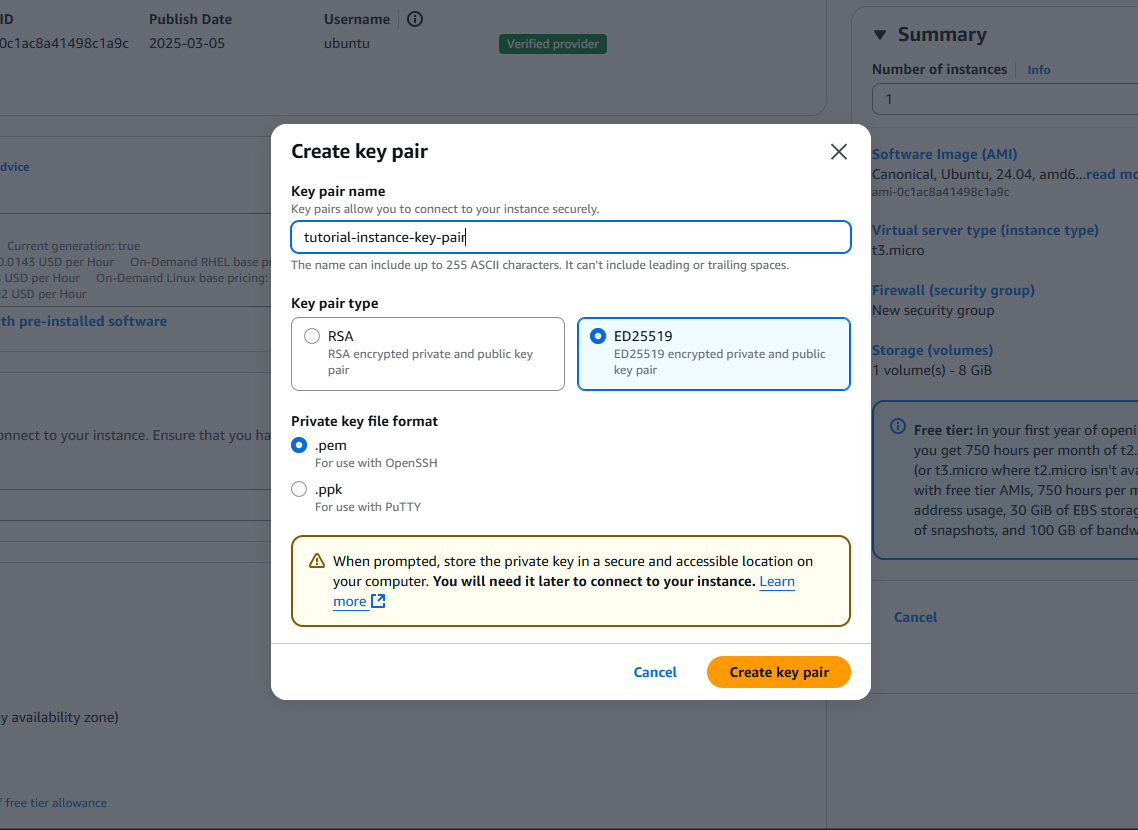
The key-pair("tutorial-instance-key-pair.pem" in my case) will be created, and will be downloaded to my computer.
5. Network settings.
For the network settings, we'll leave everything as it is by default. We'll learn more about some or all of the default selections(security groups, VPC, Subnets, and more) in subsequent Zed Labs blog articles.

6. Configure storage.
For storage, simply update the pre-inserted space amount from 8 to 30.
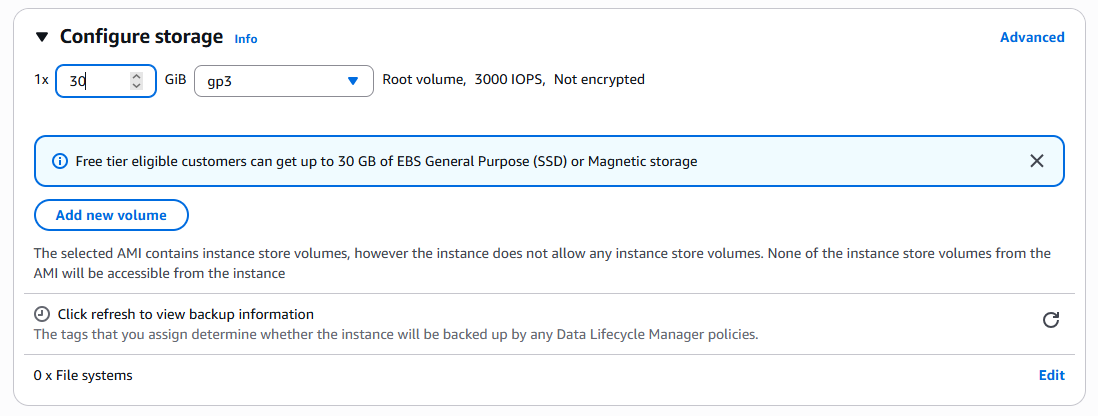
And that will be it for all the necessary selections.
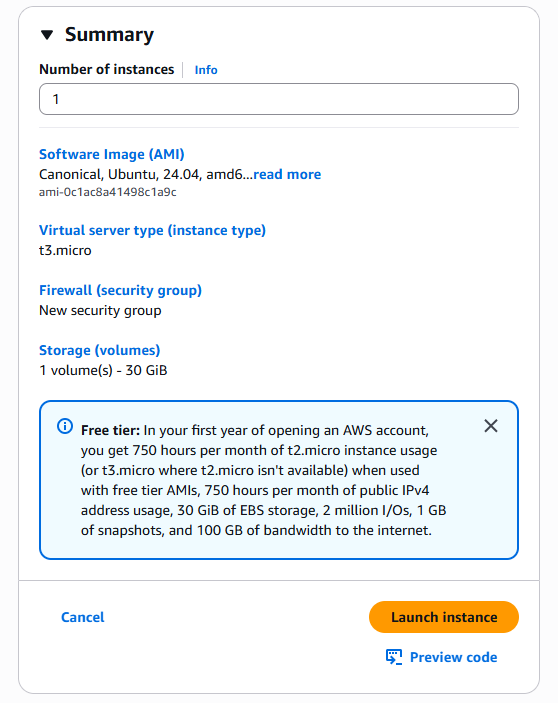
View your instance summary on the right side of the screen, and without any further selection, proceed to click "Launch instance".
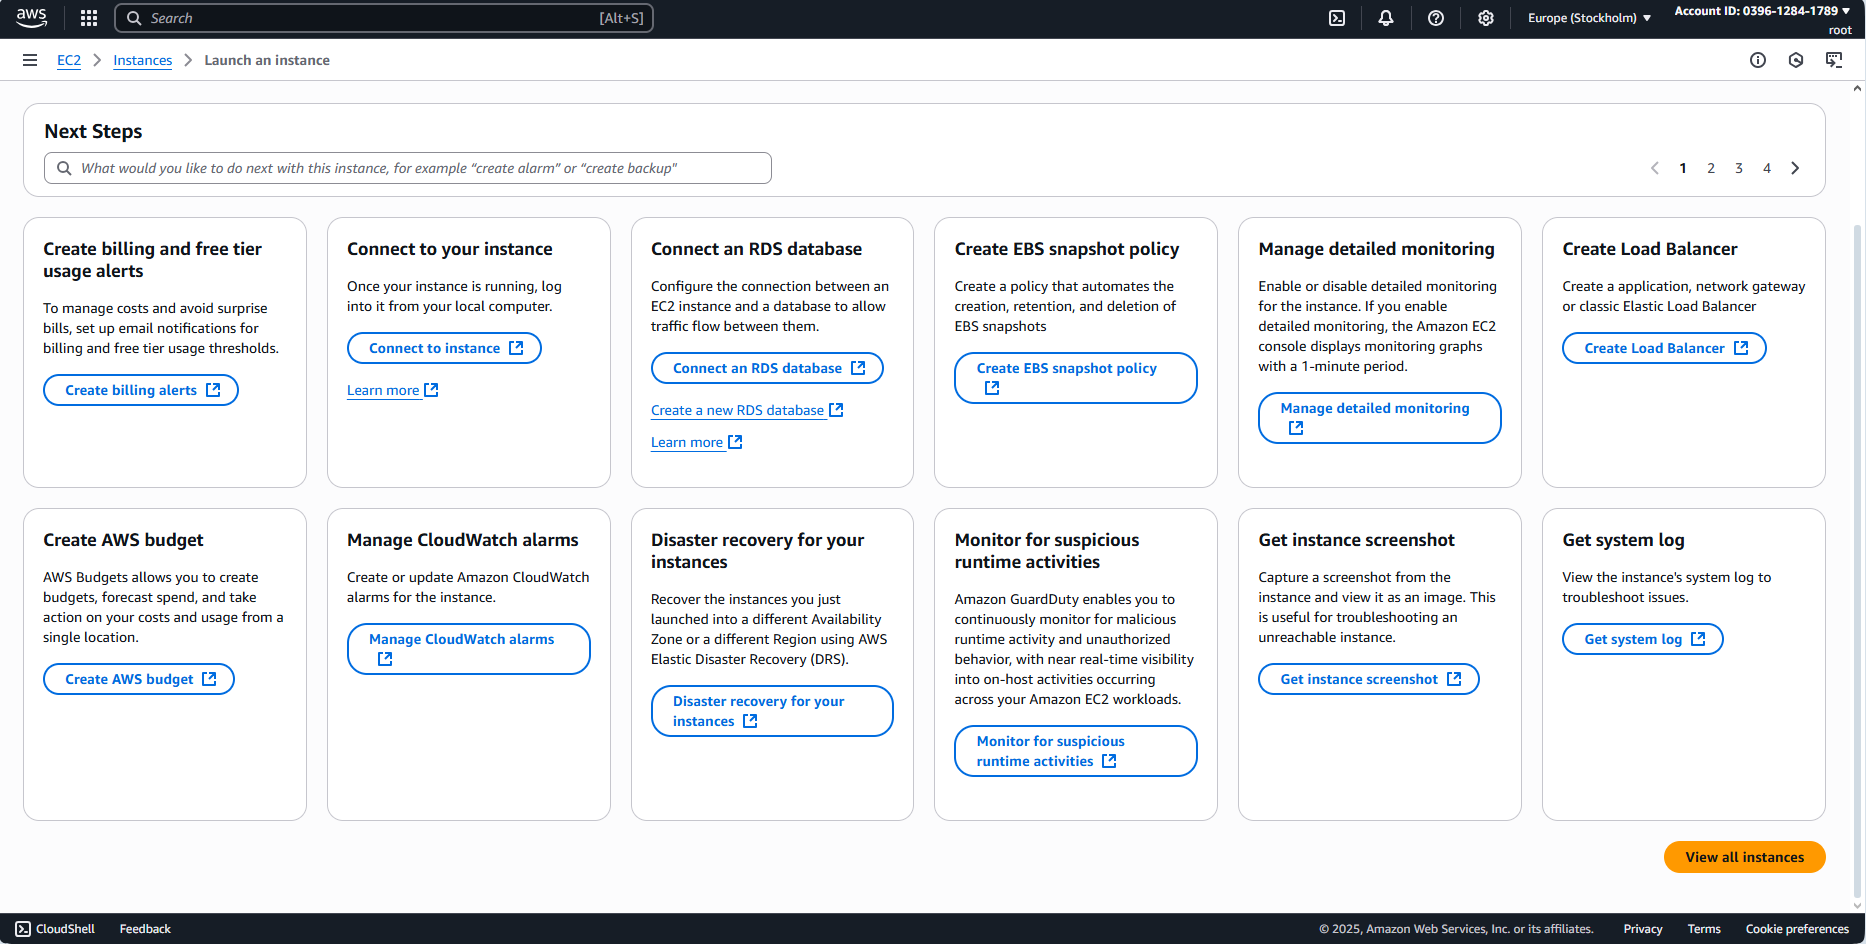
Once your instance is successfully created, you'll be directed to a this next screen. Scroll to the button of the page, and click on "View all instances".
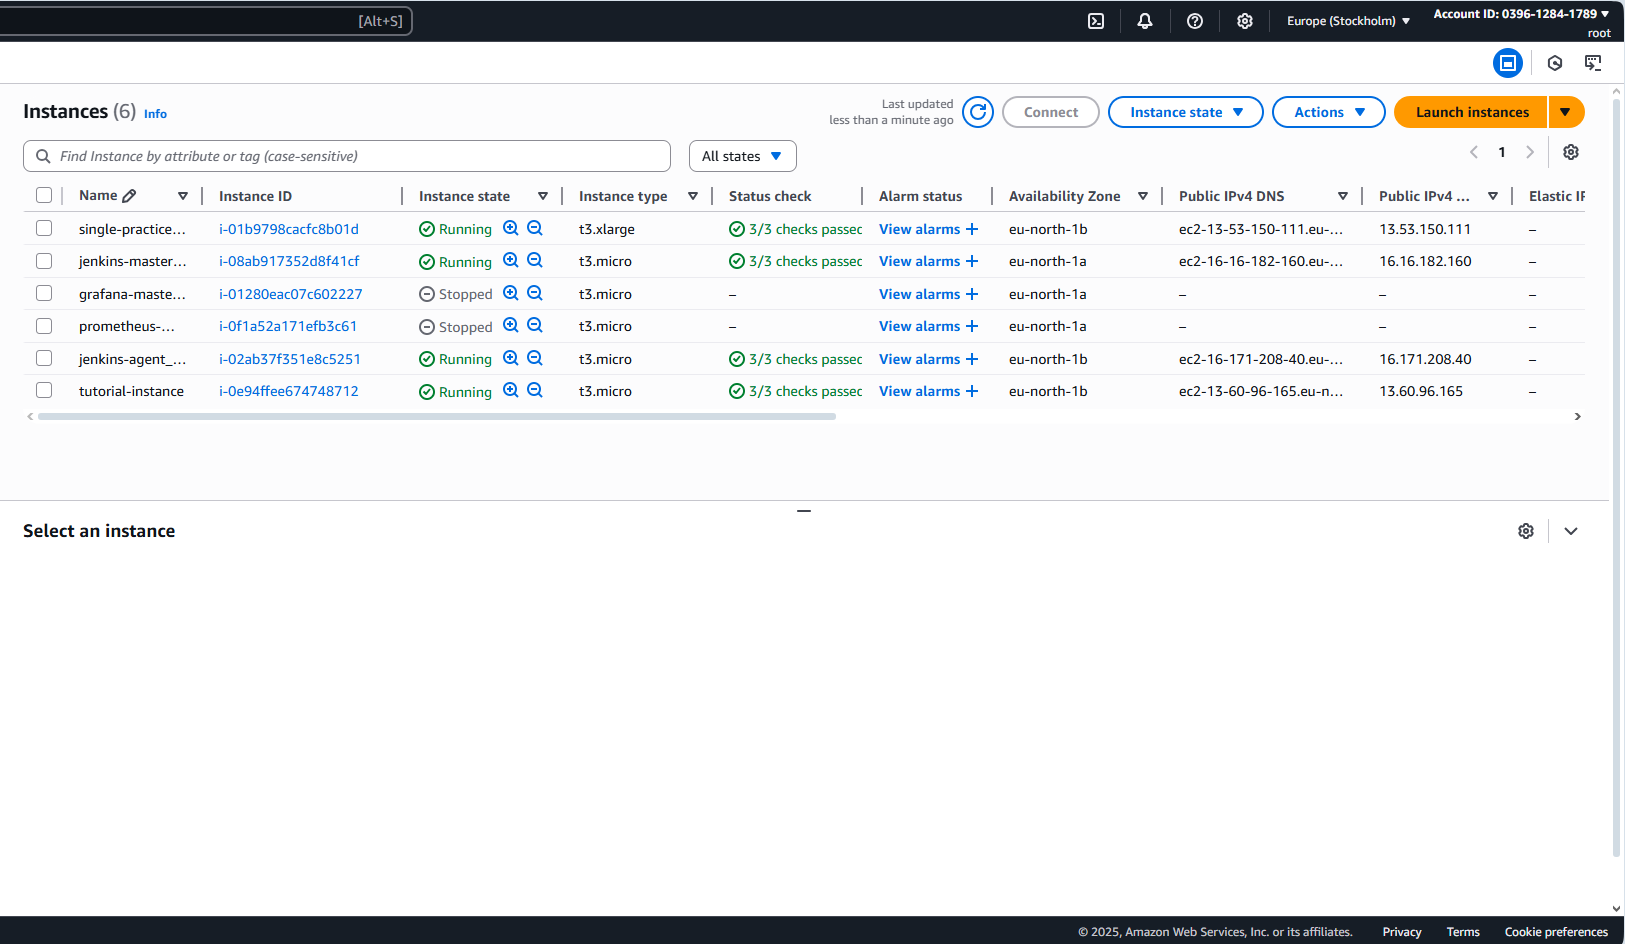
- Click the checkbox next to your newly created instance, to pre-view it's details.
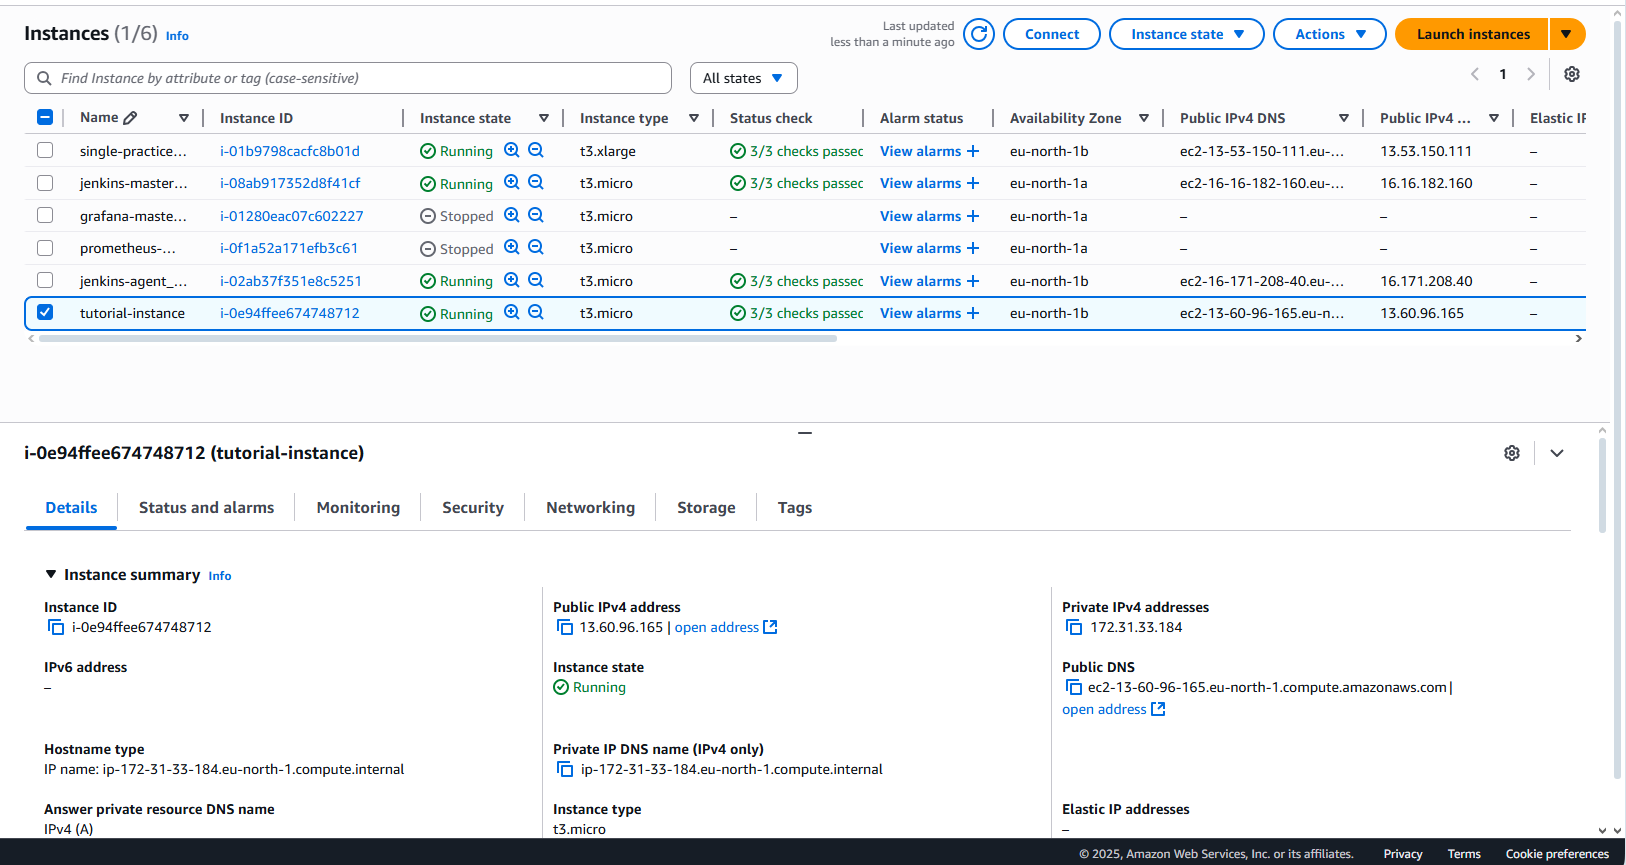
- Click on the "Instance Id" and proceed to the instance page proper.
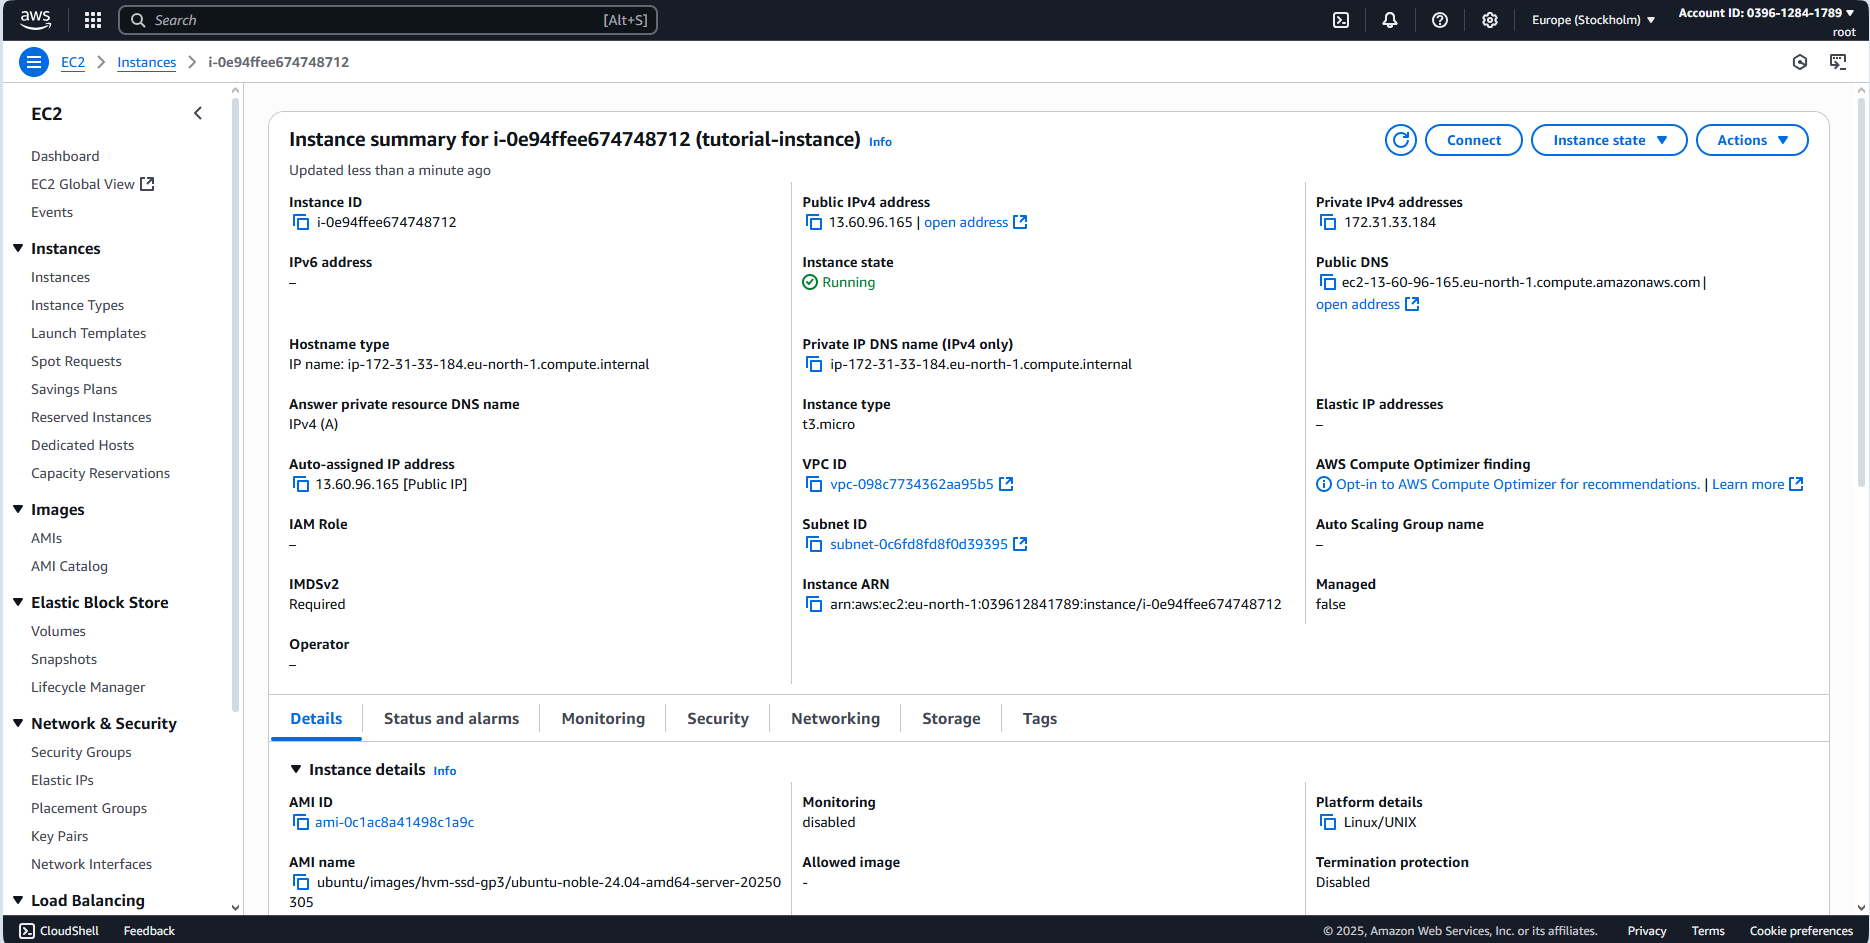
Connecting To The Newly Created EC2 Instance.
On the instance page, Click the "Connect" button to head to the connection screen.
I have two recommendations, with respect to connecting to your EC2 instances
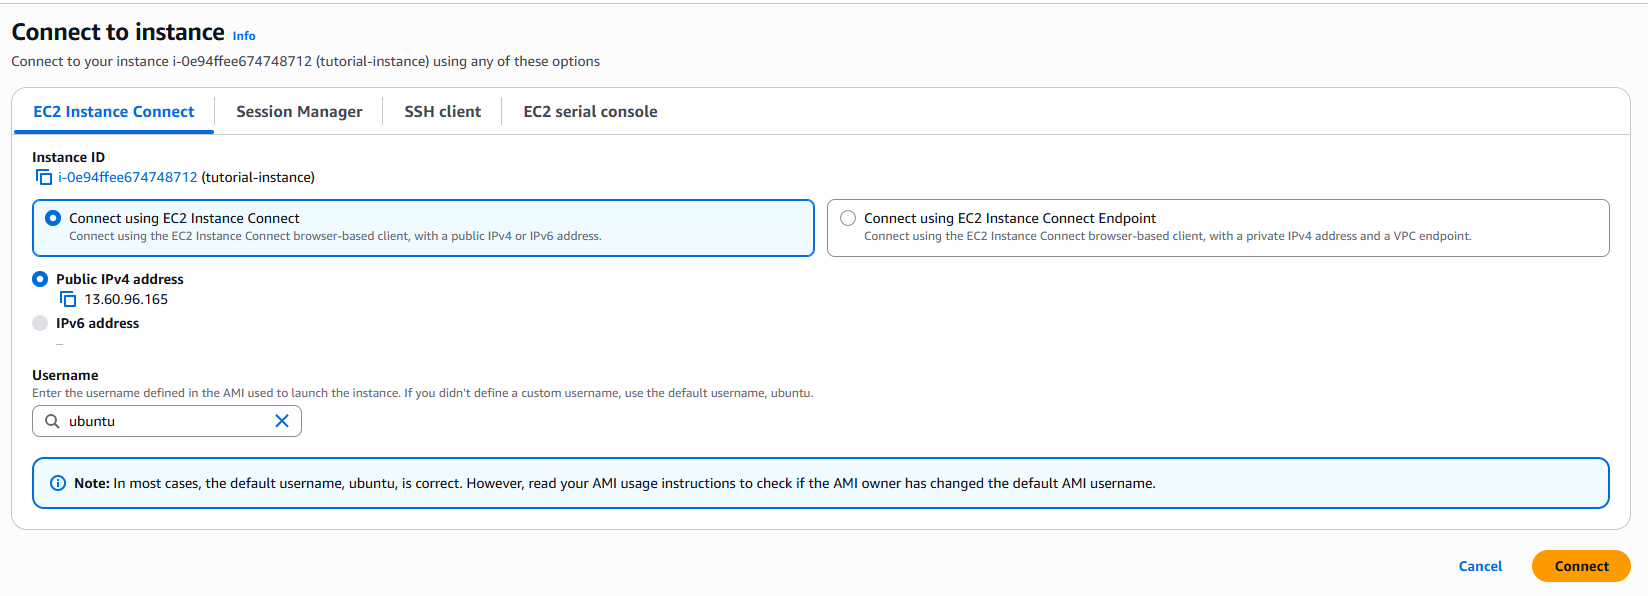
- EC2 Instance Connect.
This default selection helps you connect to your instance directly from inside the browser. With this, AWS simply provide you an in-browser shell interface from which you can perform actions on the newly created virtual machine.
While on it(EC2 Instance Connect), click the "Connect" button to see this in action.
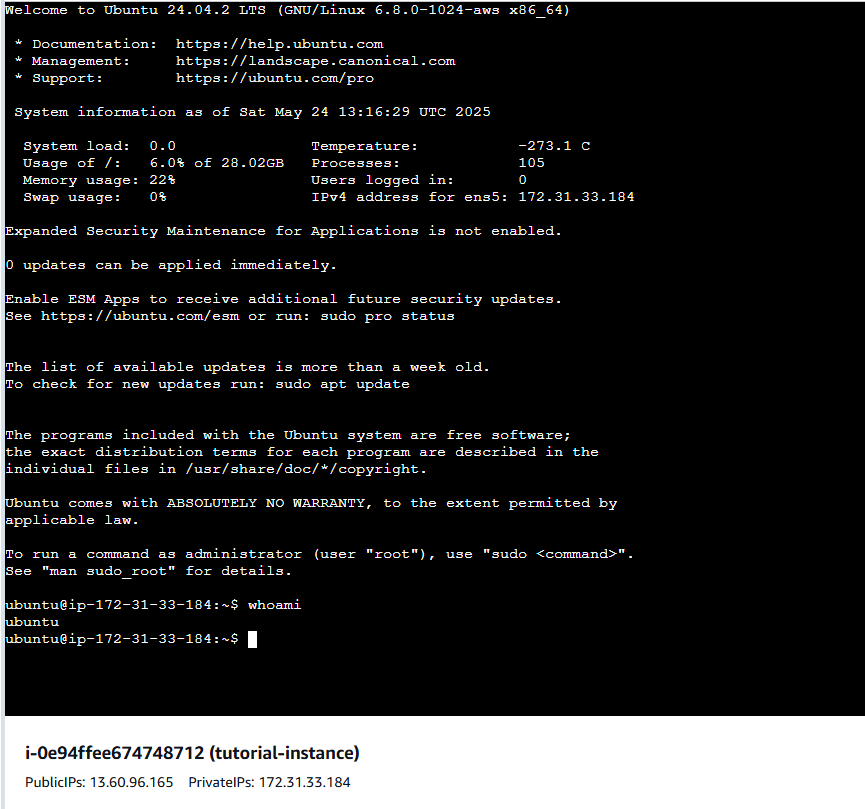
In the resulting shell interface, type the below command and press "Enter" to see the current VM user.
1whoamiYou should get the response("ubuntu") as shown in the image below.
From this in-browser browser shell, you can conveniently use your VM as desired. But due to performance/speed issues and other constraints. I recommend using the "SSH Client" option.
- SSH Client.
For the "SSH Client" option, first start by locating the "key-pair" file that was downloaded to your computer earlier, and write out the path to the file.
I prefer saving such inside an "SSH" directory somewhere on my PC.
The path on my machine looks like this /c/directory-name/another-directory-name/SSH/tutorial-instance-key-pair.pem.
Note that if you're working with file paths on a windows operating system environment, you'll need to add the file paths within quotes when using them in the commands.
I.e. "C:\directory-name\another-directory-name\SSH\tutorial-instance-key-pair.pem" instead of just C:\directory-name\another-directory-name\SSH\tutorial-instance-key-pair.pem
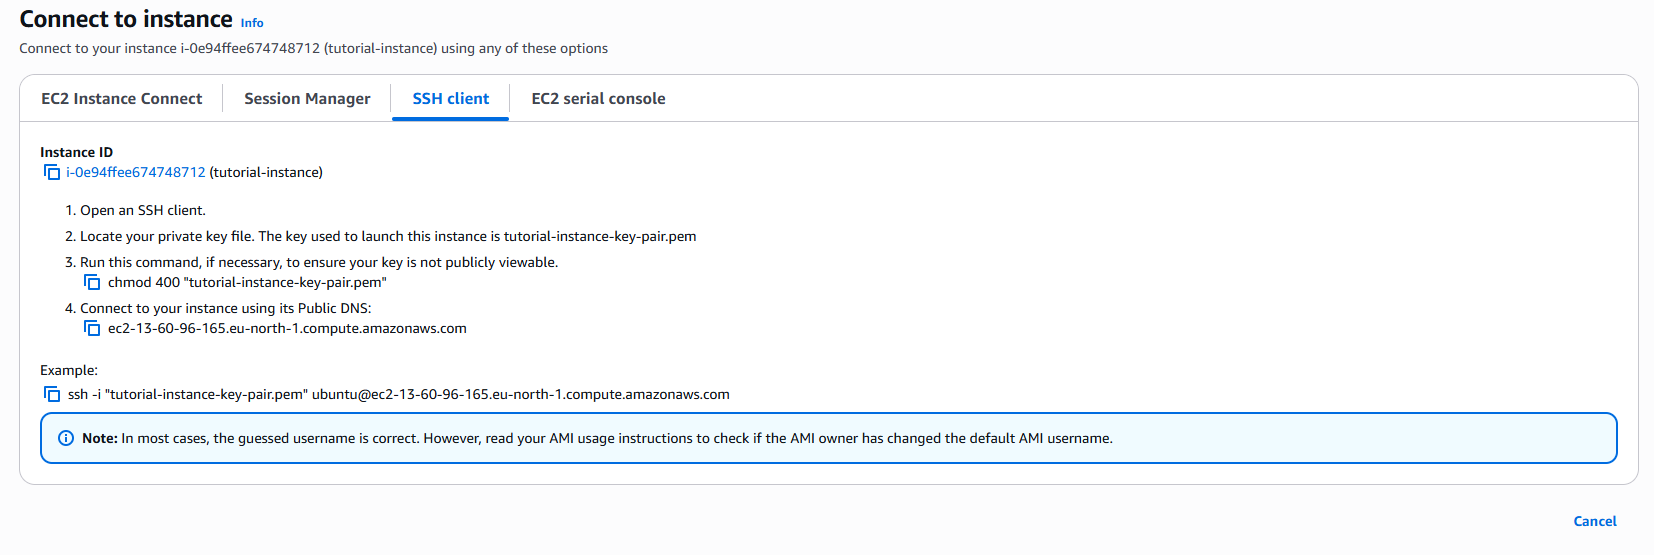
Now open a new terminal window inside your code-editor, or any other shell environment that supports SSH, then do the following - as can be seen on the "SSH Client" tab screen.
- Run the below command to change the permission on the file so that only the owner(your current computer user) can read it.
1chmod 400 <path to SSH key-pair>For me, that would be.
1chmod 400 /c/directory-name/another-directory-name/SSH/tutorial-instance-key-pair.pem- Secondly, run the below command to log into your VM via SSH.
1ssh -i <path to SSH key-pair> ubuntu@<public IP or Public DNS of the instance>The public DNS can be found on the fourth todo of the current("SSH Client") option screen.

In my case, the resulting command will be:
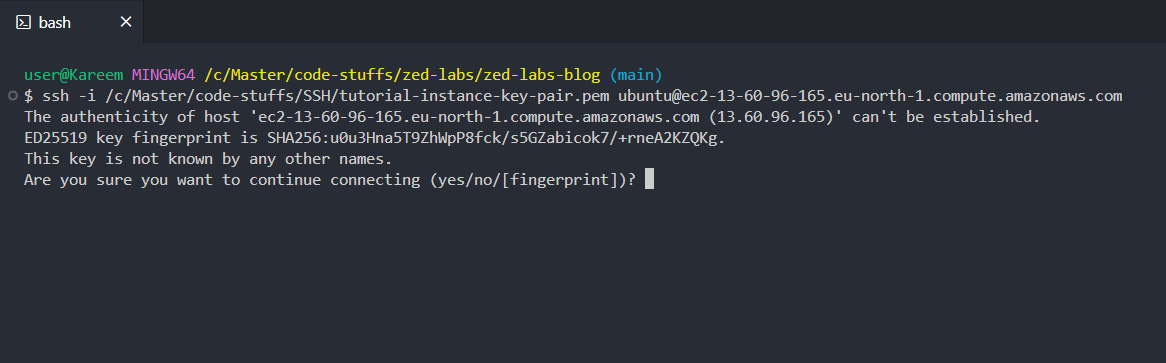
1ssh -i /c/directory-name/another-directory-name/SSH/tutorial-instance-key-pair.pem ubuntu@ec2-13-60-96-165.eu-north-1.compute.amazonaws.comThis Zed Labs Blog Article on how public key SSH authentication actually works, is an awesome resource that explains what the above command is all about, and how it works under the hood.
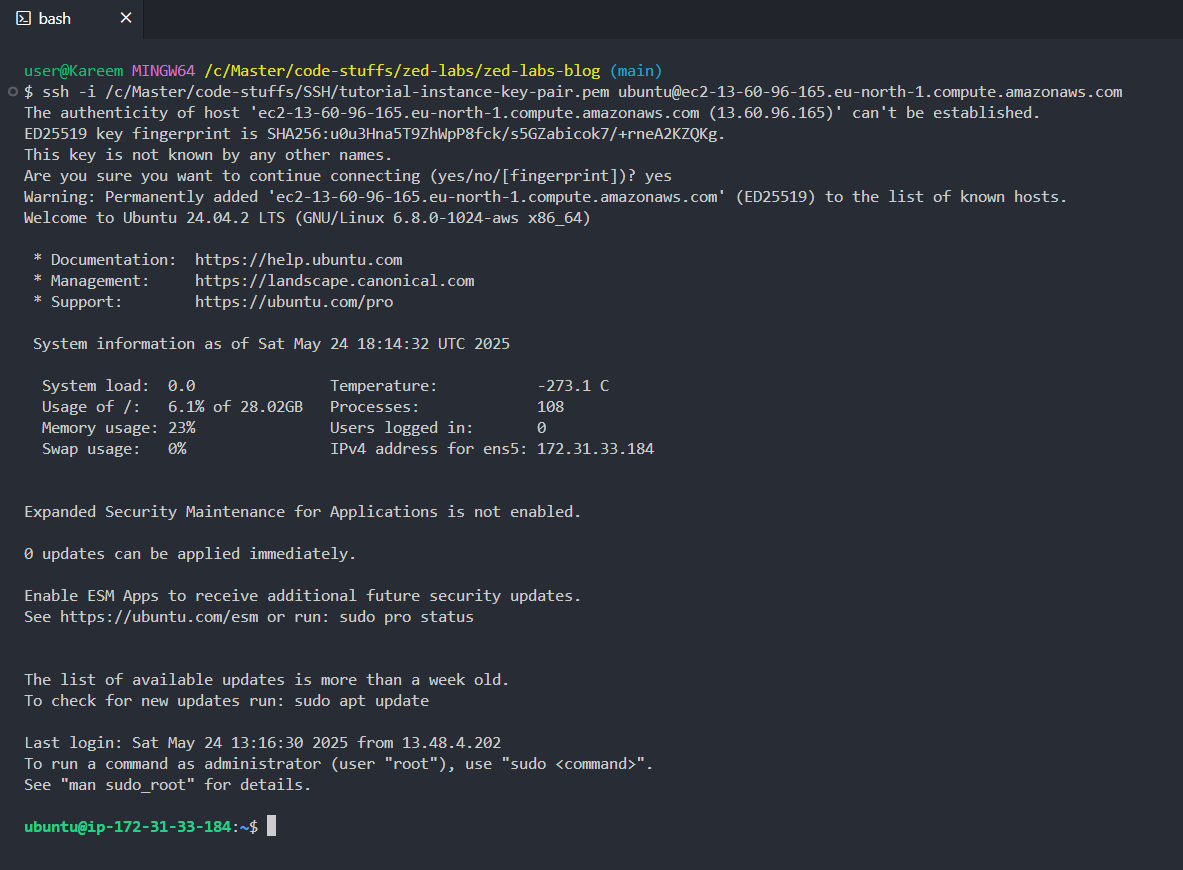
You'll get a prompt that looks like the one in the screenshot below, type in yes and hit "Enter".
And just like that, you'll be logged into your EC2 virtual machine shell interface.
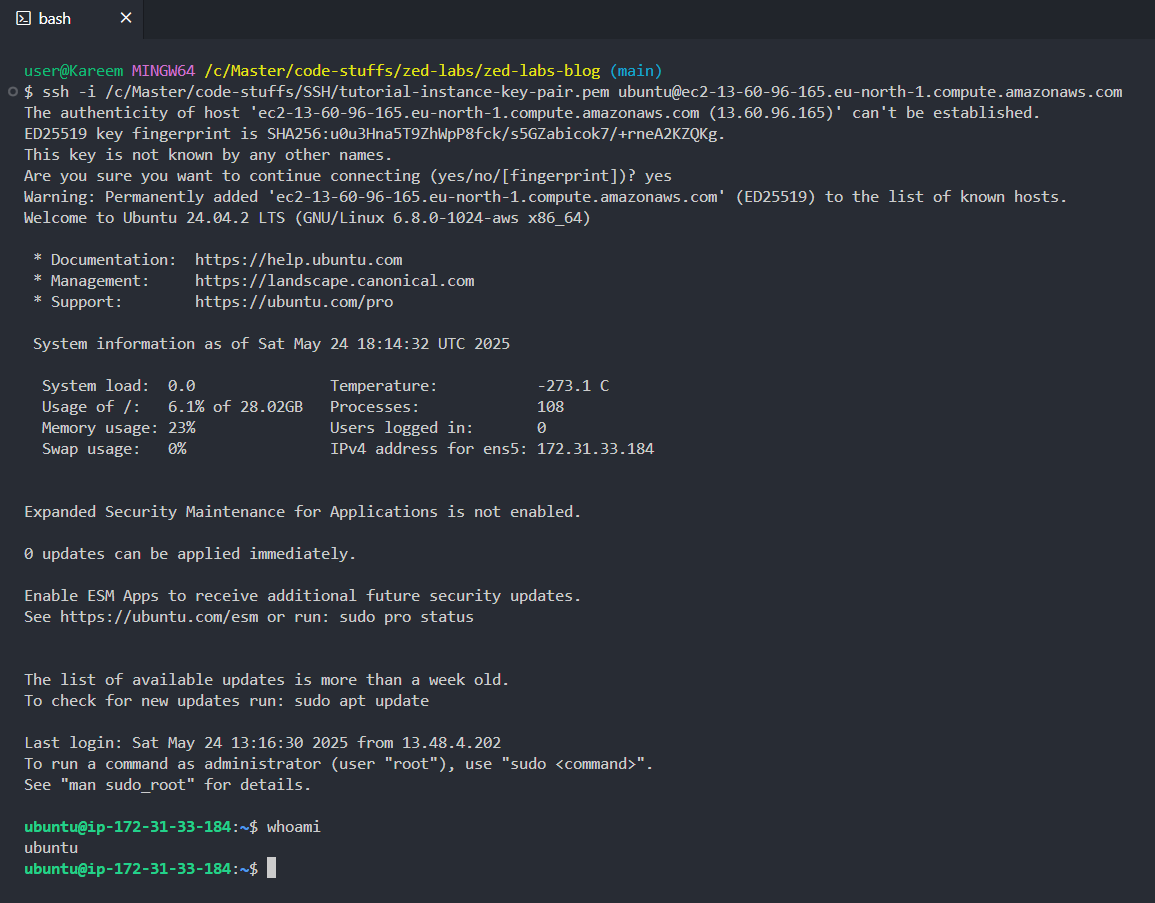
Once again, type in:
1whoamiYou should get the response("ubuntu") as shown in the image below.
Congratulations, you just successfully created, and connected to a virtual machine thanks to AWS EC2.
What To Do Next.
It's all up to you from here. Proceed to make good use of the newly created VM for the purpose it was created.
In the next Zed Labs blog article, I'll be sharing a thorough and highly professional guide, that details a standard and complete deployment of a production-grade NodeJs API server on AWS EC2.
You sure don't want to miss it.
Hire the Zed Labs Team - Let's bring your software and design projects to life.
We've still got project/client slots for this month. The team at Zed Labs is open to having you on board, and making you a happy client. We look forward to collaborating with you on any web or design project you have.
-
If you would love to have us build awesome stuff for you, simply visit our website, and fill the contact form. Alternatively, you can send us an email here: hello.zedlabs@gmail.com.
-
You can also send me a private email at okpainmondrew@gmail.com or a DM via Linkedin - just in case you prefer to contact me directly.
We'll be excited to hop on a call and get on the way to bringing your software or design project to life.
Conclusion.
That would be it for this article. Much thanks for reading thus far.
Virtual machines are powerful, and a practical knowledge of how to create(provision) and manage them, is an indispensable super-power - especially in today's modern software engineering landscape that involves so much cloud operations.
See you in the next couple of smashing cloud engineering and DevOps articles.
If you loved this post or any other Zed Labs blog post, and would love to send an appreciation, simply use this link to buy us some cups of coffee 🤓.
Cheers!!!